OpenFOAM: An Open-Source CFD Software
OpenFOAM (Open Field Operation and Manipulation) is a free, open-source computational fluid dynamics (CFD) toolkit. It is widely used for simulating fluid flow, heat transfer, and other related processes in various engineering disciplines. OpenFOAM provides a range of solvers for different applications, enabling users to simulate complex physical phenomena in industries like aerospace, automotive, and chemical processing.
Key Features
- Open-Source: OpenFOAM is completely open-source, meaning you can access, modify, and redistribute the source code under the GNU General Public License (GPL).
- Extensibility: The software is highly customizable, allowing users to write their own solvers, utilities, and libraries to cater to specific simulation needs.
- Wide Range of Applications: From simple laminar flows to highly complex turbulent flows, OpenFOAM supports a variety of physical models, including multi-phase flow, combustion, electromagnetics, and more.
- Parallel Computing: OpenFOAM supports parallel processing using MPI (Message Passing Interface), allowing users to run large-scale simulations on high-performance computing (HPC) clusters.
- Mesh Generation: OpenFOAM offers advanced mesh generation tools, including boundary layers and complex geometries.
- Post-processing: It supports extensive post-processing utilities and integrates with visualization software such as ParaView.
Applications
OpenFOAM is used in a wide array of industries and research fields. Some of its common applications include:
- Aerodynamics: Simulating airflow over aircraft and vehicles for performance optimization.
- Hydrodynamics: Modeling water flow in rivers, lakes, and oceans for environmental studies.
- Chemical Engineering: Simulating chemical reactions and mixing in reactors.
- Turbomachinery: Analyzing fluid flow in turbines, compressors, and pumps.
- Multiphase Flows: Studying interactions between multiple fluids in systems like oil reservoirs or industrial separation processes.
Installation
OpenFOAM is available on Linux, macOS, and Windows. The installation procedure varies depending on the platform.
NOTE:
This documentation is created solely for the purpose of improving HPC skills and is intended for personal use on a laptop or personal machine.
The steps outlined in this document are executed on a local setup and are meant for educational and skill-building purposes only.
It is important to note that this setup is done on a personal machine and should not be considered as a guideline for production or enterprise-level configurations.
Now, we can see the installation process for Rocky Linux (open-source) as part of this documentation.
This guide outlines the steps for setting up OpenFOAM and other components for personal use and skill development, not for large-scale or server-level environments.
1. Download the Source Code (OpenFOAM and Third-Party Libraries)
Since you're working in an offline environment, you cannot directly download the OpenFOAM source code and third-party libraries. Therefore, you should:
Download the Source Code and Third-Party Libraries: Download the OpenFOAM source code and third-party libraries on a machine that has internet access.
You can download the source code from the OpenFOAM
Similarly, download the necessary Third-party libraries
Transfer the Files to the Offline Machine: After downloading, copy the source code and third-party libraries to an external drive (e.g., USB drive or external hard disk).
Move to the Offline Machine: Connect the external drive to the offline machine and copy the downloaded files to the appropriate directory on the offline machine.
Why This Step is Required: This step is necessary because the offline machine doesn't have internet access. By downloading the files on a connected machine and transferring them, you ensure that the OpenFOAM and third-party libraries are available for the installation process.
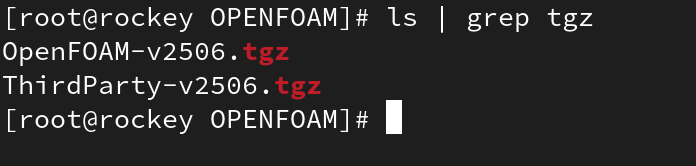 

2. Extract the Source Code and Verify Files
After downloading, extract the source code and third-party libraries using the tar command. Ensure that the files are extracted correctly.
tar -xvf openfoam-source.tar.gz

tar -xvf third-party.tar.gz
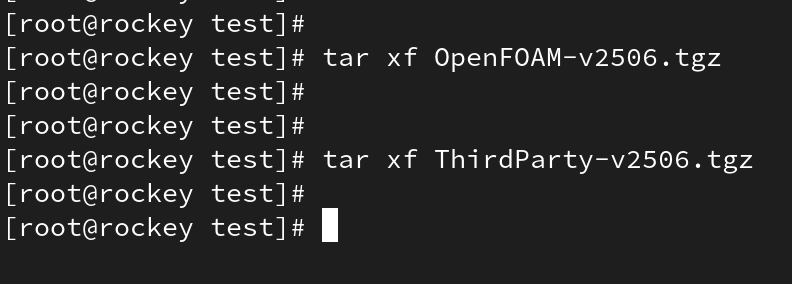
 Why This Step is Required:
Extracting the files ensures that the source code and libraries are properly decompressed and placed in their respective directories. Verifying the extraction makes sure no files are corrupted or missing.
Why This Step is Required:
Extracting the files ensures that the source code and libraries are properly decompressed and placed in their respective directories. Verifying the extraction makes sure no files are corrupted or missing.
3. Navigate to the OpenFOAM Directory
Once the files are extracted, go to the OpenFOAM directory where you'll make necessary configurations.
cd OpenFOAM-version
Why This Step is Required:
This directory is the root folder of your OpenFOAM installation, where configuration files like bashrc are located. You will need to modify settings specific to your system here.
4. Locate the bashrc File
Navigate to the etc directory to find the bashrc file.
cd etc
ls bashrc
Why This Step is Required:
The bashrc file contains environment variable settings for OpenFOAM, such as library paths and compiler configurations. It needs to be properly configured to make sure OpenFOAM works correctly on your system.
5. Edit and Update the bashrc File
Open the bashrc file in an editor and make changes according to your system’s configuration.
vi etc/bashrc
Why This Step is Required:
You must configure the bashrc file to reflect your specific environment (e.g., adjusting paths to libraries or tools). Without these adjustments, OpenFOAM will not function correctly on your system.
6. Source the bashrc File
After editing the bashrc file, source it to apply the changes.
source OpenFOAM-version/etc/bashrc
Why This Step is Required:
Sourcing the bashrc file loads the environment variables and configurations into your current session. This step is essential for OpenFOAM to recognize the newly set paths and settings.

7. Check OpenFOAM Status
To verify if OpenFOAM has been correctly compiled, check the environment variables.
echo $WM_PROJECT_DIR
echo $WM_PROJECT_USER_DIR
echo $WM_THIRD_PARTY_DIR
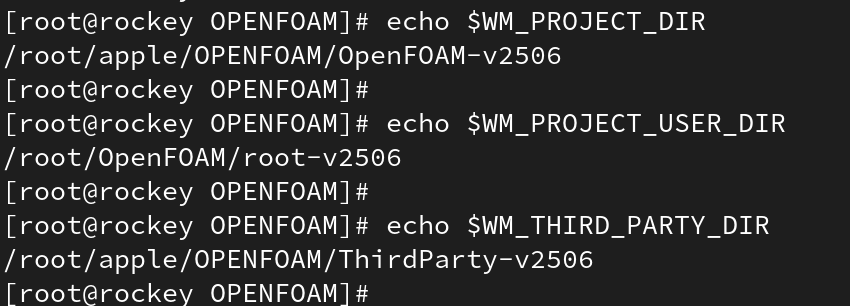 Why This Step is Required:
Checking these variables confirms that the paths to OpenFOAM and its third-party libraries are correctly set.
Why This Step is Required:
Checking these variables confirms that the paths to OpenFOAM and its third-party libraries are correctly set.
8. Run foam Command to Check Environment Variables and OpenFOAM Installation Status
8.1. Verify Environment Variables:
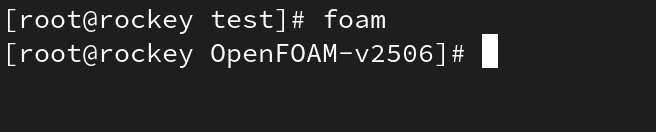
After sourcing the bashrc file, run the foam command. This command checks if the environment variables are correctly set and ensures that OpenFOAM is configured properly.
foam
Why This Step is Required:
The foam command helps confirm that the environment variables such as $WM_PROJECT_DIR, $WM_PROJECT_USER_DIR, and $WM_THIRD_PARTY_DIR are correctly set. If the variables are set properly, this command will navigate you to the OpenFOAM version's installation directory.
8.2. Run foamInstallationTest:
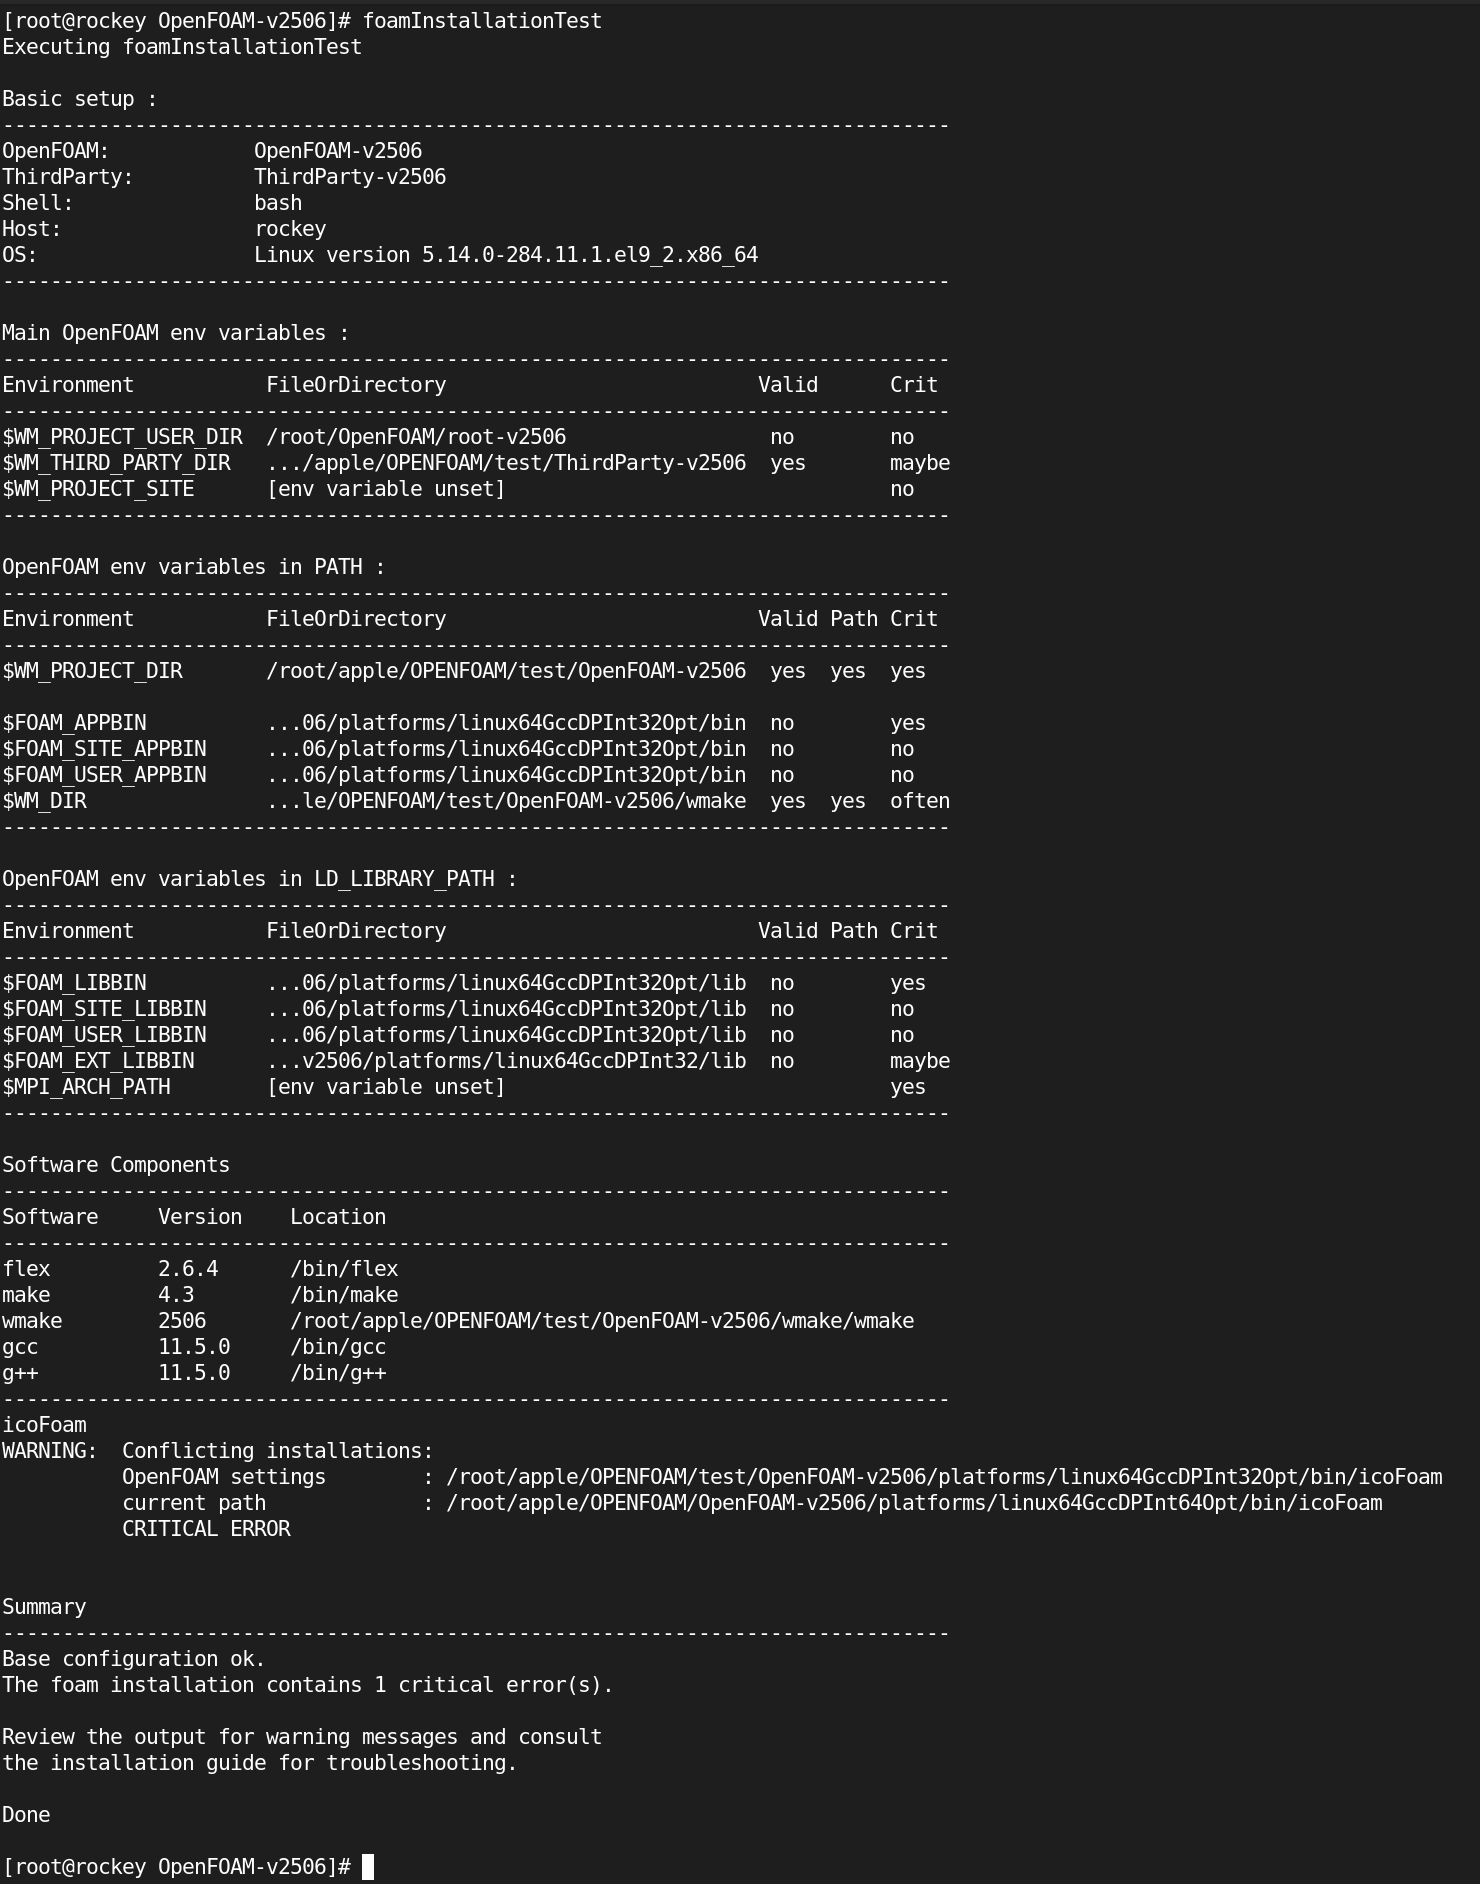
After running the foam command, execute foamInstallationTest to verify if OpenFOAM is compiled successfully.
foamInstallationTest
Why This Step is Required:
The foamInstallationTest command checks the status of the OpenFOAM installation.
- If OpenFOAM has been compiled successfully, the command will show a status message indicating that everything is set up correctly.
- If OpenFOAM has not been compiled, the output will provide an error or status message indicating that the compilation has not been completed, allowing you to troubleshoot further.
9. Start Compilation of OpenFOAM
To compile OpenFOAM, run the ./Allwmake command.
./Allwmake
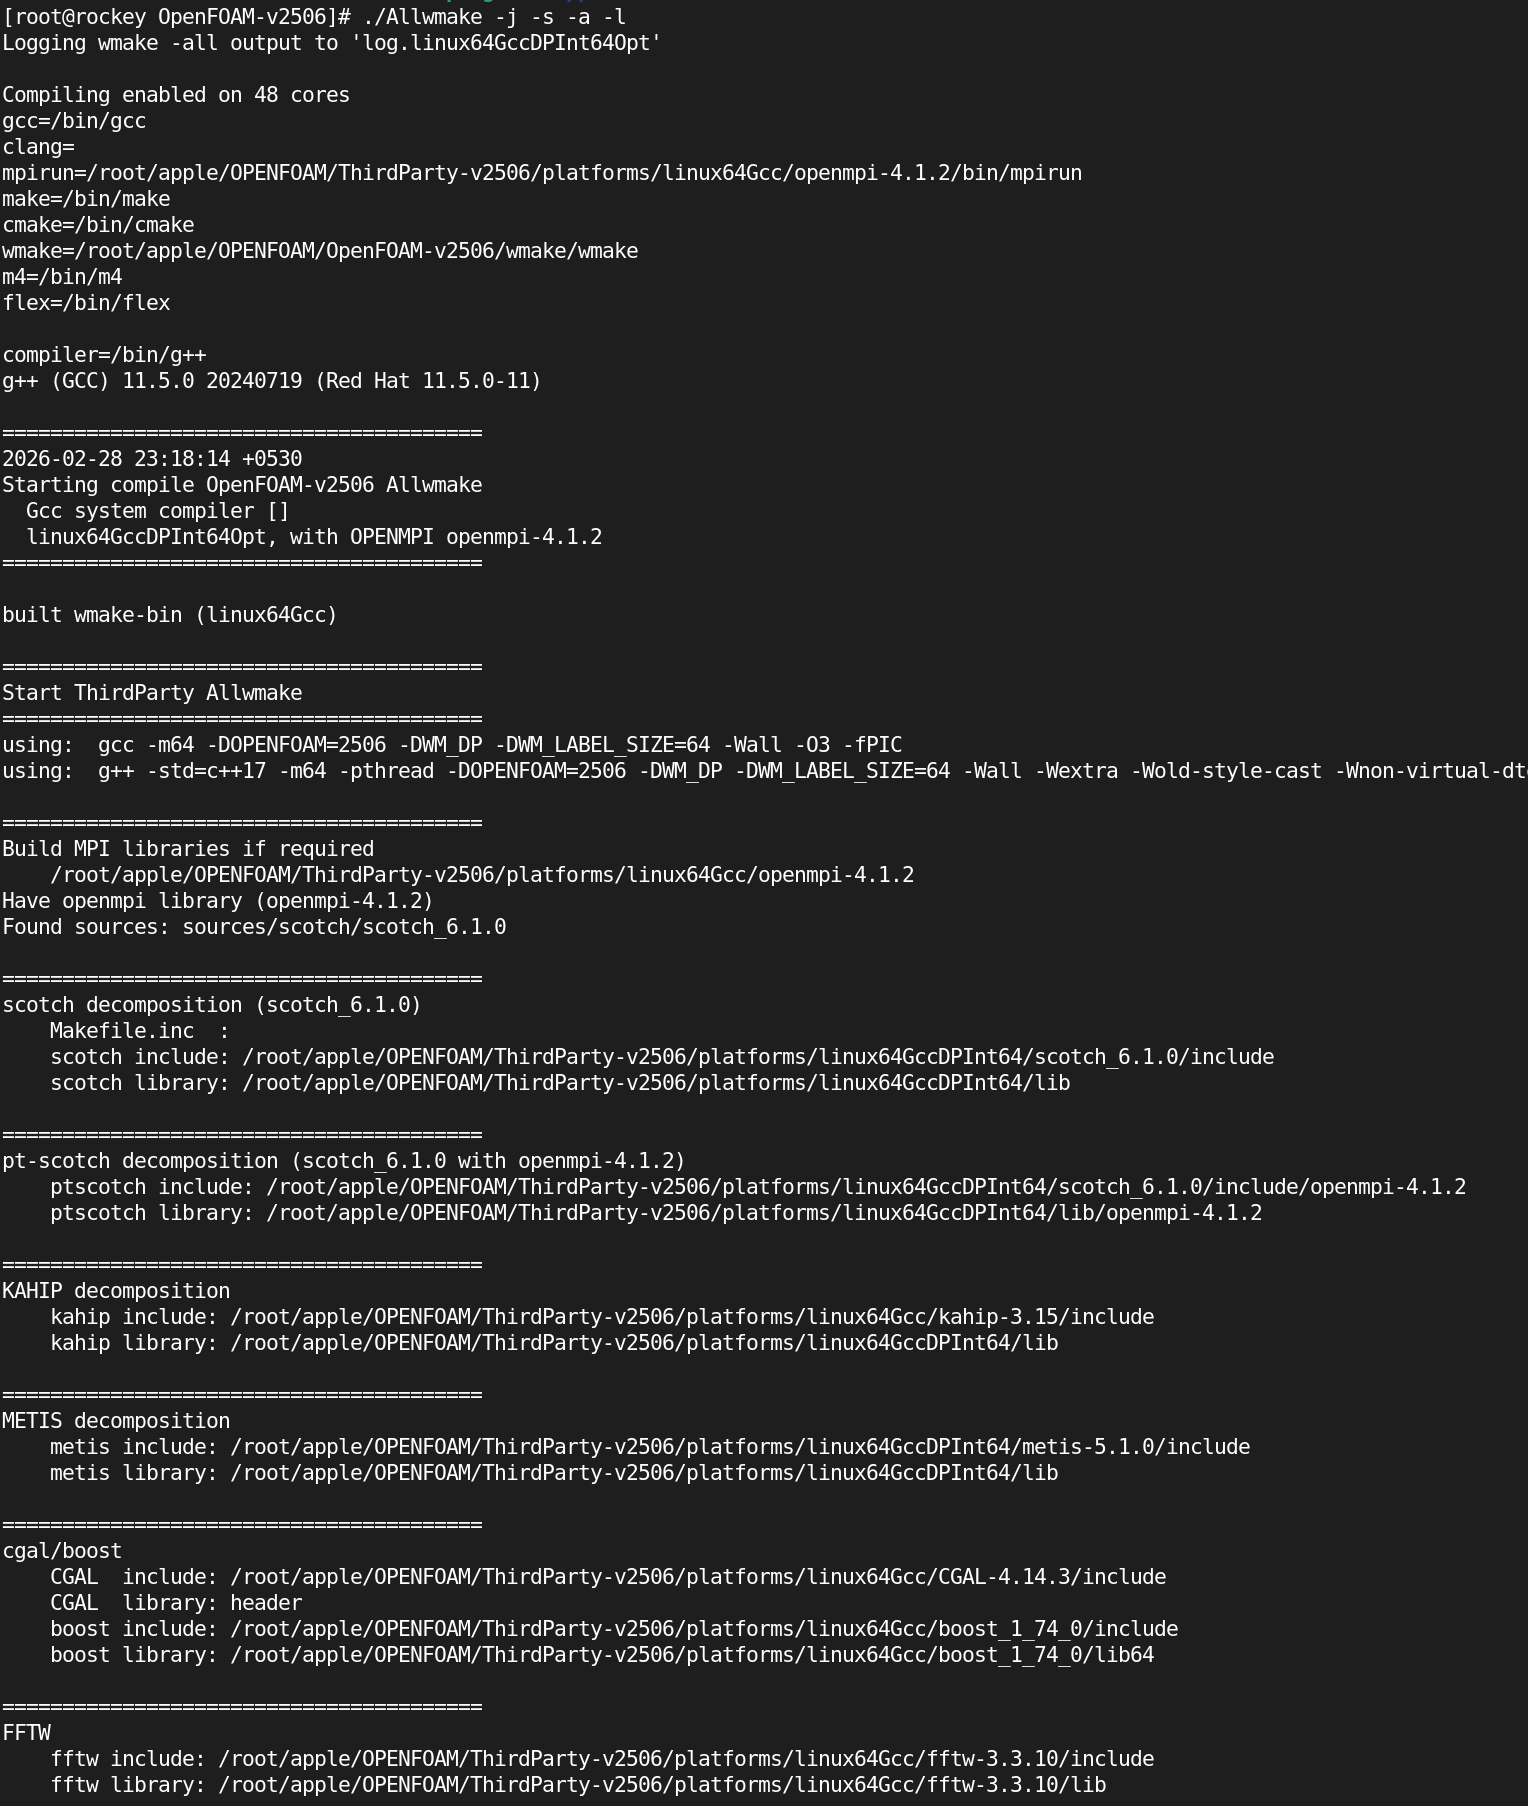
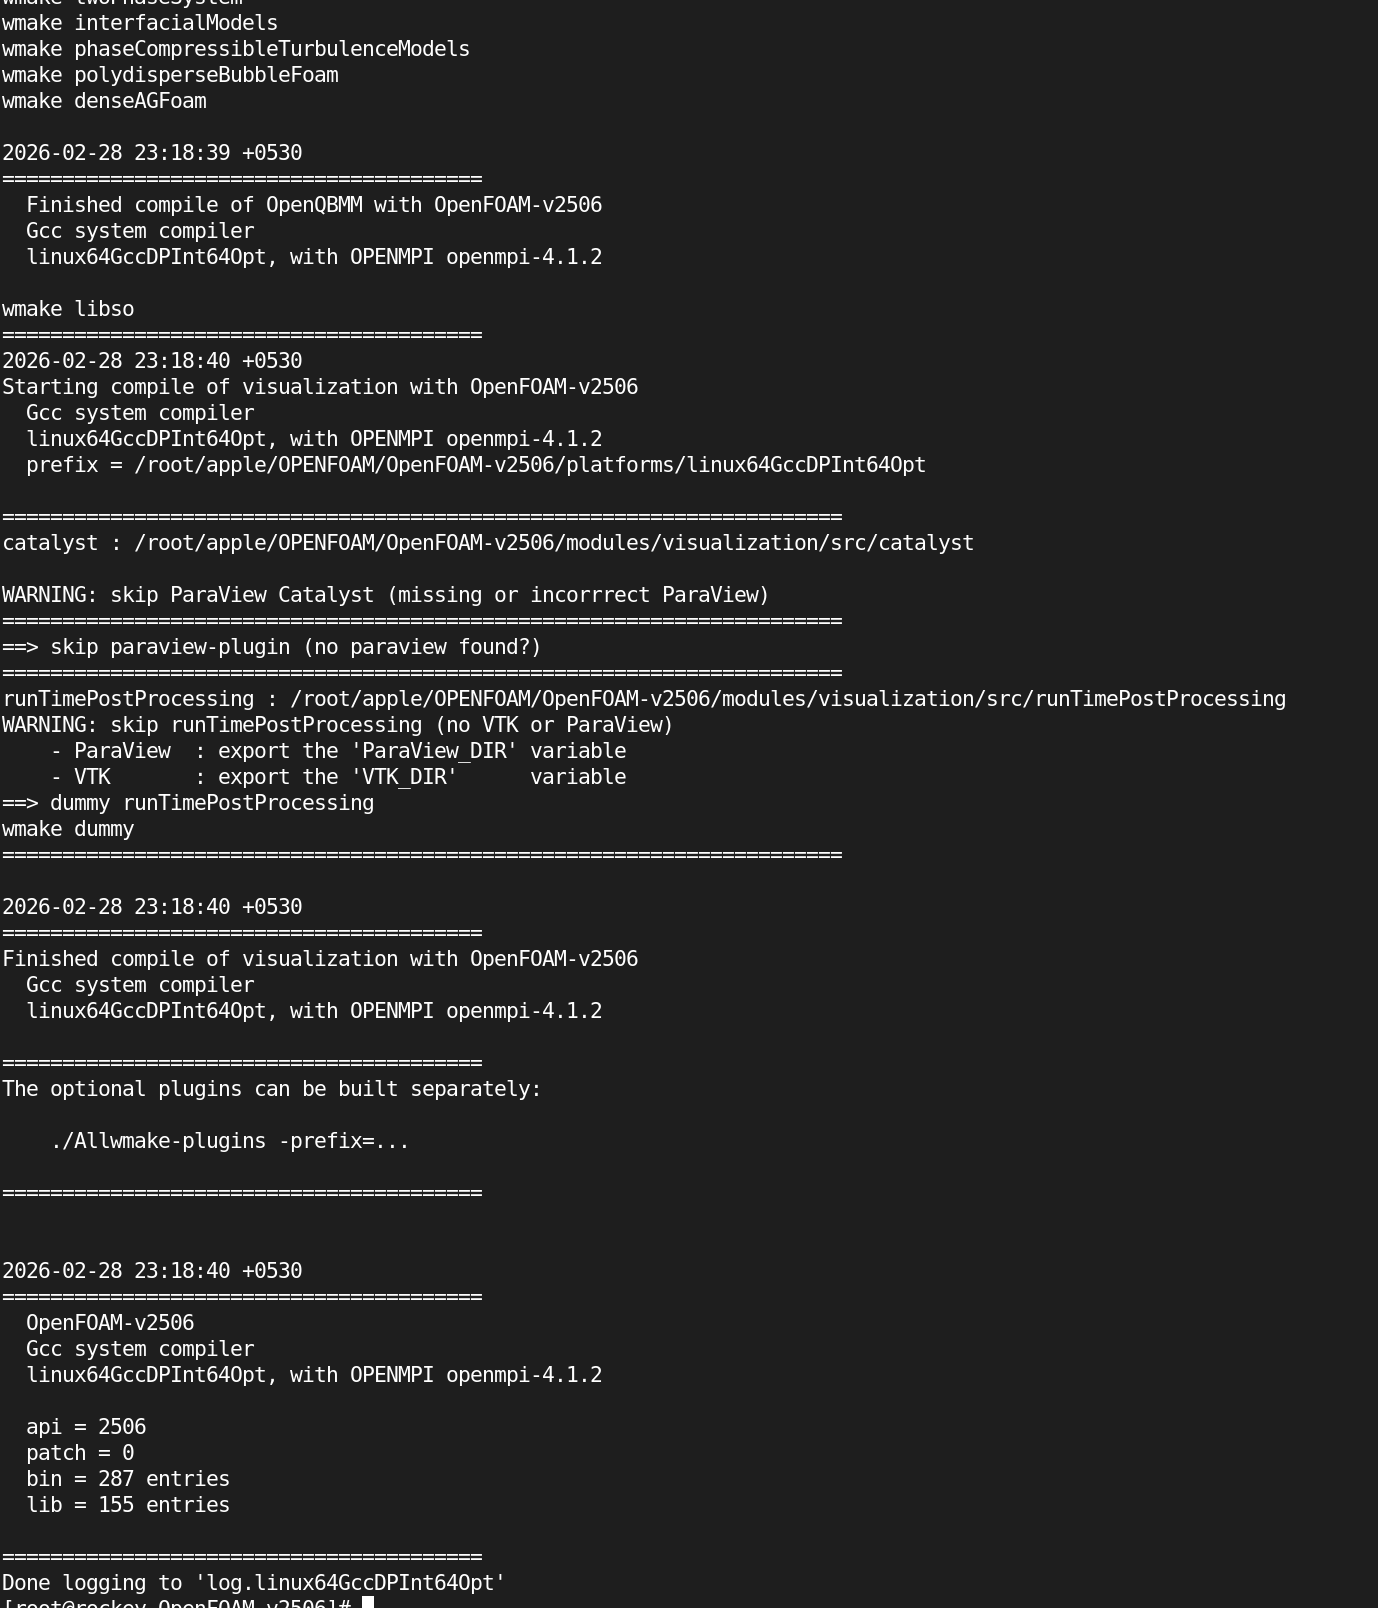
Why This Step is Required: This command starts the full OpenFOAM compilation process. It will compile solvers, utilities, and libraries, and it can take a long time depending on your system resources.
10. Scenario 2: Compile Third-Party Libraries First
In the ThirdParty-v2506 directory, you will find various make files for different third-party libraries required by OpenFOAM. To start compiling the third-party libraries, you will need to use the ./Allwmake command.
10.1. Navigate to the Third-Party Directory:
First, navigate to the ThirdParty-v2506 directory where the third-party libraries and make files are located.
cd $WM_THIRD_PARTY_DIR
10.2. List the Available Make Files**: You can list the contents of the directory to see the available make files for each third-party library.
ls
The output will look like:
   Allclean  build     COPYING     etc         makeCCMIO  makeCmake  makeGcc         makeHDF5   makeKAHIP  makeMesa          makeMETIS     makeMPICH    makeOPENMPI          makeParaView          makePETSC  makeSCOTCH  makeVTK.example  platforms  Requirements.md  SOURCES.md
   Allwmake  BUILD.md  Environ.md  makeAdios2  makeCGAL   makeFFTW   makeGperftools  makeHYPRE  makeLLVM   makeMesa.example  makeMGridGen  makeMVAPICH  makeOPENMPI.example  makeParaView.example  makeQt     makeVTK     minCmake         README.md  sources
10.3. Start Compilation with Allwmake:
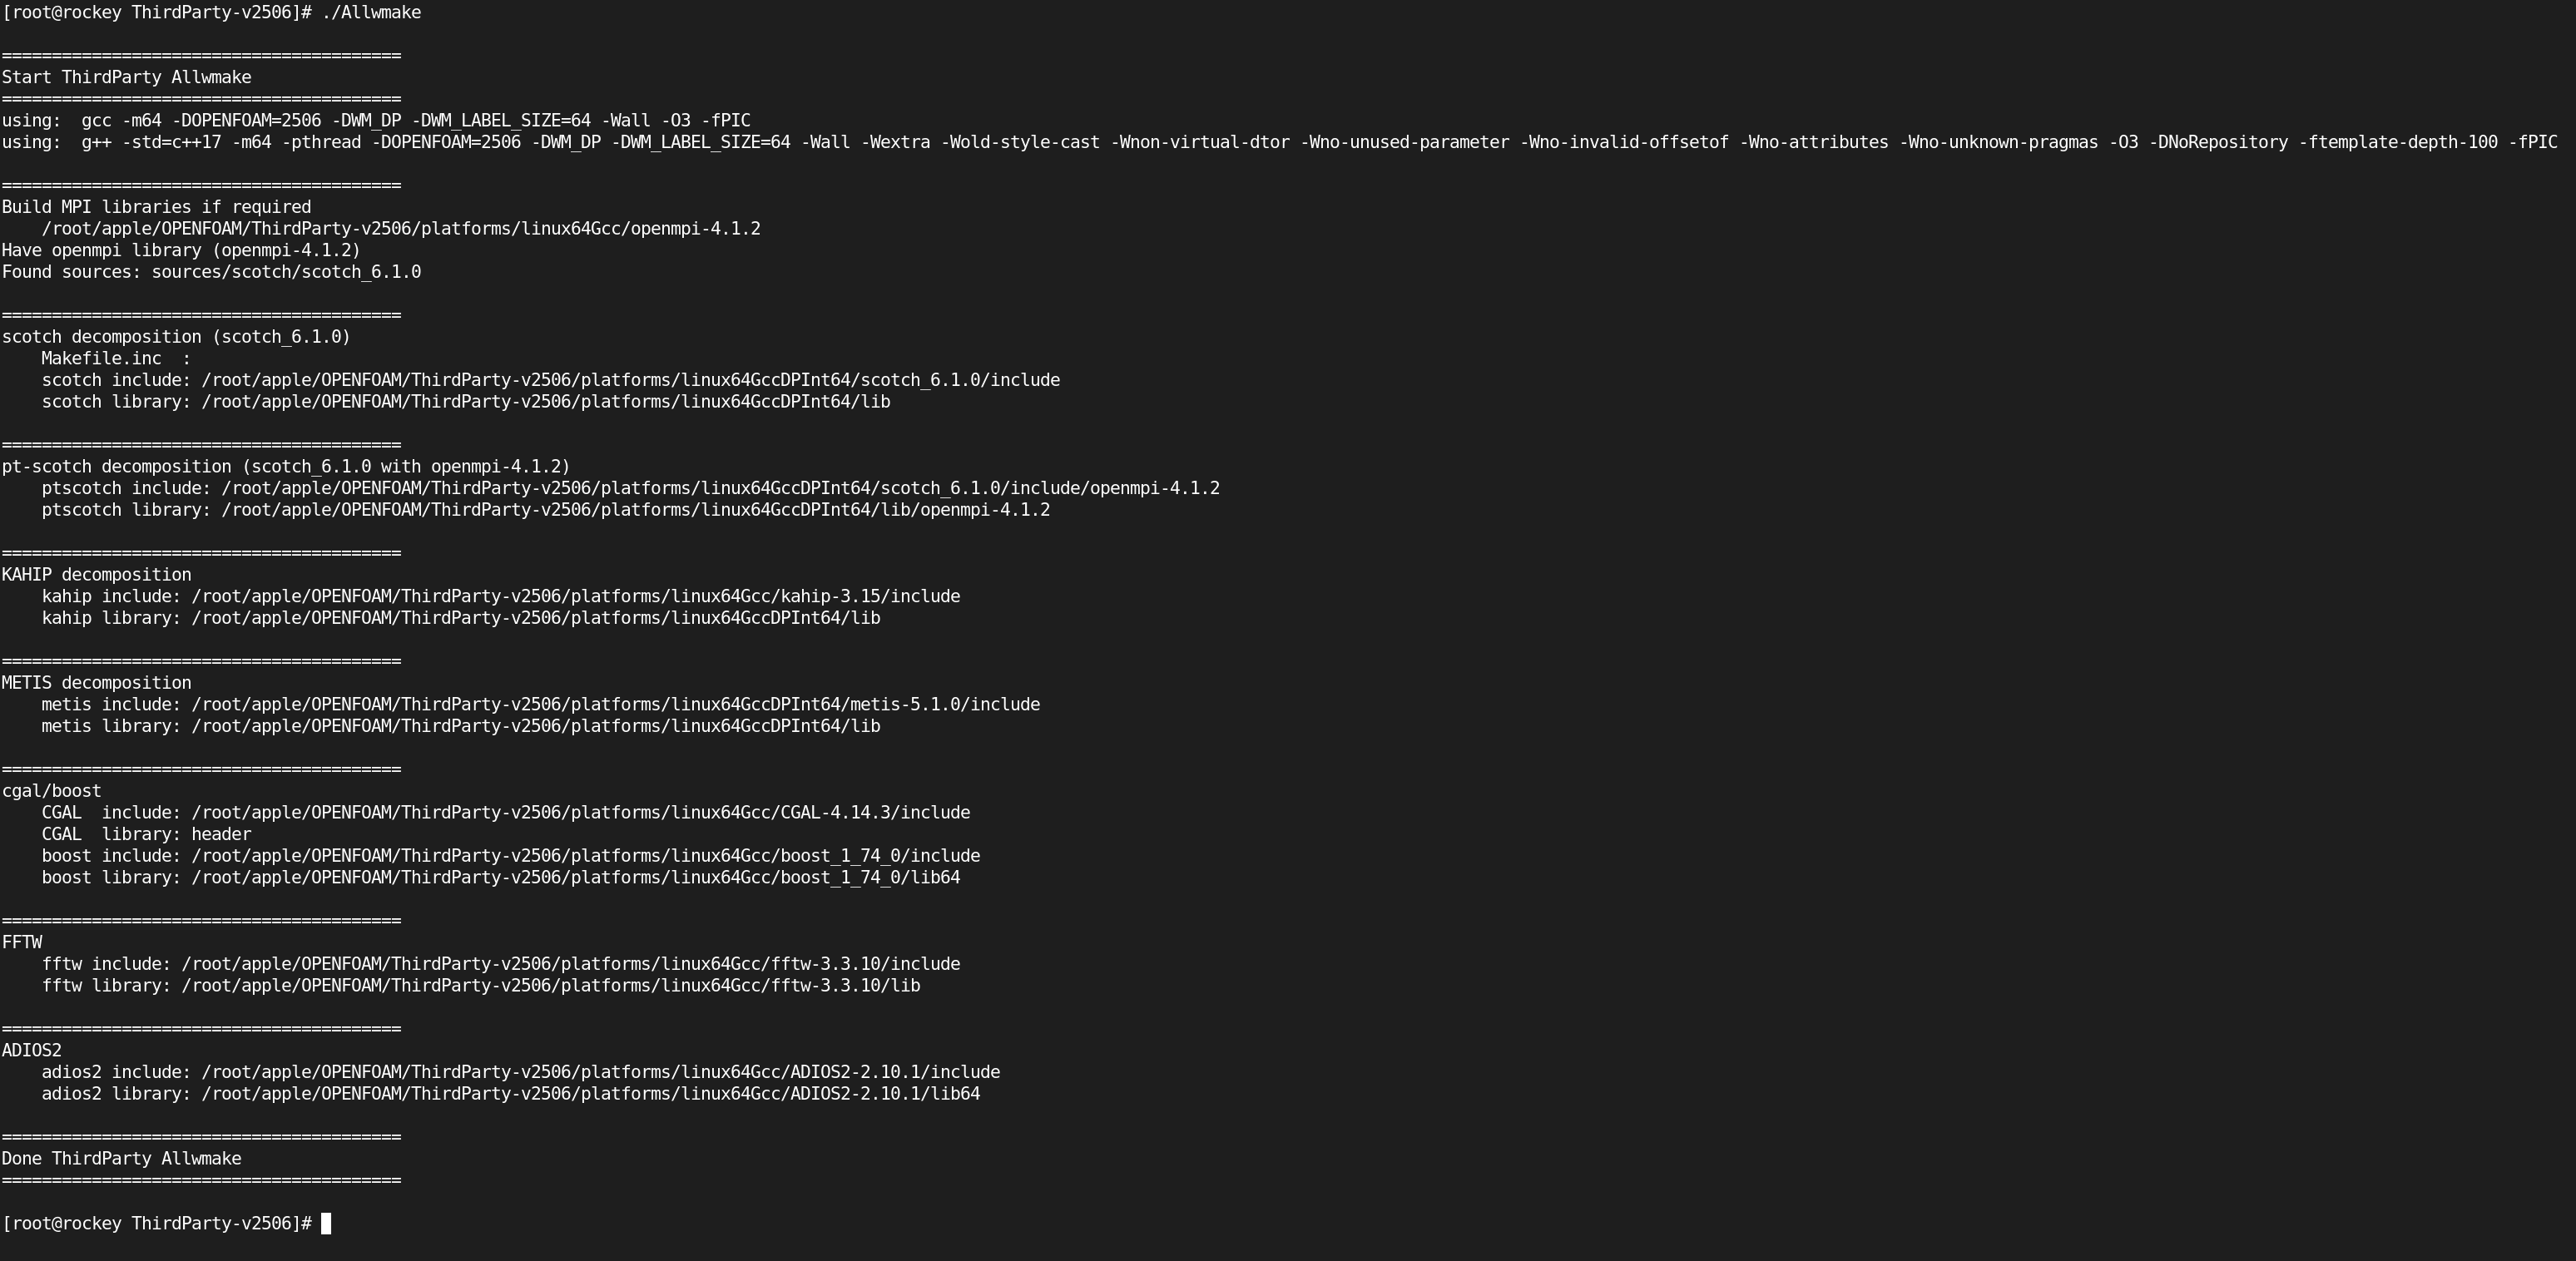
Run the Allwmake command to start the compilation process for all third-party libraries.
./Allwmake
 Why This Step is Required:
The
Why This Step is Required:
The Allwmake command will compile all necessary third-party libraries, such as METIS, SCOTCH, MPICH, and others, which are required for OpenFOAM to function properly. This process can take a significant amount of time depending on your system's resources. If any errors occur during the compilation, you can investigate them by checking the log output.
10.4. Monitor for Errors: If any libraries fail to compile, you may encounter error messages. Common errors could include missing source code, incorrect versions, or misnamed files.
To manually compile a specific library: If you know which library is failing, you can navigate to its specific directory and run its individual make command.
For example, to compile makeMPI:
makeMPICH
11. Re-source the bashrc After Compilation:
After the third-party libraries are successfully compiled, you must re-source the bashrc file to ensure that the environment is updated.
source $WM_PROJECT_DIR/etc/bashrc
Why This Step is Required:
After compiling the third-party libraries, re-sourcing the bashrc file ensures that OpenFOAM recognizes all compiled libraries and dependencies. This step is essential before proceeding with the compilation of OpenFOAM itself.
12. Compile OpenFOAM After Third-Party Compilation
Now that all dependencies are compiled, start the OpenFOAM compilation by running the following command in the OpenFOAM version directory.
cd $WM_PROJECT_DIR
./Allwmake -j -s -a -l
Why This Step is Required: This command triggers the final OpenFOAM compilation.
-j: Enables parallel compilation. It uses multiple processor cores to build the software much faster than a serial build.
-s: Silent mode. It keeps the terminal clean by hiding most of the standard output, showing only critical information or errors.
-a: Rebuild all files. It forces a complete recompilation of every component, even if it looks like it’s already been built.
-l: Log output. It typically redirects the build progress and errors to a log file (often named log.Allwmake) so you can check for failures later
13. Check OpenFOAM Installation After Compilation
After completing the compilation of OpenFOAM, you should run the foamInstallationTest command again to verify the successful installation and proper configuration of OpenFOAM.
13.1. Run foamInstallationTest Again:
After OpenFOAM is compiled, run the following command to confirm that the setup is correct:
foamInstallationTest
Why This Step is Required:
Running foamInstallationTest ensures that OpenFOAM and its dependencies are properly configured and installed. It checks the environment variables, paths, and critical systems to ensure everything is set up for smooth operation.
13.2. Review the Output:
After running the command, you should see output that includes the configuration status of OpenFOAM.
Here's an example of what you might see:
   Basic setup :
   -------------------------------------------------------------------------------
   OpenFOAM:            OpenFOAM-v2506
   ThirdParty:          ThirdParty-v2506
   Shell:               bash
   Host:                rockey
   OS:                  Linux version 5.14.0-284.11.1.el9_2.x86_64
   -------------------------------------------------------------------------------

   Main OpenFOAM env variables :
   -------------------------------------------------------------------------------
   Environment           FileOrDirectory                          Valid      Crit
   -------------------------------------------------------------------------------
   $WM_PROJECT_USER_DIR  /root/OpenFOAM/root-v2506                 no        no
   $WM_THIRD_PARTY_DIR   /root/apple/OPENFOAM/ThirdParty-v2506     yes       maybe
   $WM_PROJECT_SITE      [env variable unset]                                no
   -------------------------------------------------------------------------------

   OpenFOAM env variables in PATH :
   -------------------------------------------------------------------------------
   Environment           FileOrDirectory                          Valid Path Crit
   -------------------------------------------------------------------------------
   $WM_PROJECT_DIR       /root/apple/OPENFOAM/OpenFOAM-v2506       yes  yes  yes
   $FOAM_APPBIN          ...06/platforms/linux64GccDPInt64Opt/bin  yes  yes  yes
   -------------------------------------------------------------------------------

   Software Components
   -------------------------------------------------------------------------------
   Software     Version    Location
   -------------------------------------------------------------------------------
   flex         2.6.4      /bin/flex
   make         4.3        /bin/make
   gcc          11.5.0     /bin/gcc
   g++          11.5.0     /bin/g++
   -------------------------------------------------------------------------------
   icoFoam      exists     ...OAM-v2506/platforms/linux64GccDPInt64Opt/bin/icoFoam
   -------------------------------------------------------------------------------

   Summary
   -------------------------------------------------------------------------------
   Base configuration ok.
   Critical systems ok.

   Done
13.3. Interpret the Output:
- If the installation is successful, the output will indicate that the configuration and critical systems are "ok."
- If there are issues with the installation, it will highlight which components or paths are incorrect or missing.
Why This Step is Required:
Running the foamInstallationTest ensures that OpenFOAM and its dependencies have been compiled correctly and that all necessary paths and configurations are properly set up. If there are any issues, the output will provide guidance for resolving them before starting simulations.
Getting Started with OpenFOAM
After installation, you can start using OpenFOAM by running its solvers or utilities from the command line.
Here’s a basic example:
1. Prepare the Environment
Before you start running OpenFOAM, make sure that your environment is set up properly. If you’ve already installed OpenFOAM, you can skip the installation steps and move on to the configuration and testing.
1.1 Set the Environment Variables
Ensure the environment variables are properly set by sourcing the bashrc file:
source /etc/bashrc
This command configures OpenFOAM's environment, setting paths to the required binaries, libraries, and other necessary files.
2. Copy the Required Files
The first step in setting up your simulation is to copy the necessary files from the tutorial cases. These files will serve as a template for your simulation.
2.1 Navigate to the OpenFOAM Test Directory
Create directory where you want to run your test case.
For example:
cd /root/apple/OPENFOAM/test
2.2 Copy the Tutorial Files
Navigate to the $FOAM_TUTORIALS directory and copy the files to the test directory. For a basic test, you can use the icoFoam solver with the cavity test case:
cd $FOAM_TUTORIALS/incompressible/icoFoam/cavity
cp -r * /root/apple/OPENFOAM/test


This command will copy all necessary files (0, constant, system) to the test directory.
2.3 Verify the Files
After copying, check the contents of your test directory to ensure that the files are present:
ls /root/apple/OPENFOAM/test
You should see the directories 0, constant, and system, which contain the mesh and configuration files.
3. Generate the Mesh with blockMesh
The next step is to generate the computational mesh for your simulation. OpenFOAM uses blockMesh to create a simple structured grid for the simulation.
3.1 Navigate to the Test Directory
Make sure you’re in the test directory where you copied the tutorial files:
cd /root/apple/OPENFOAM/test
3.2 Run blockMesh
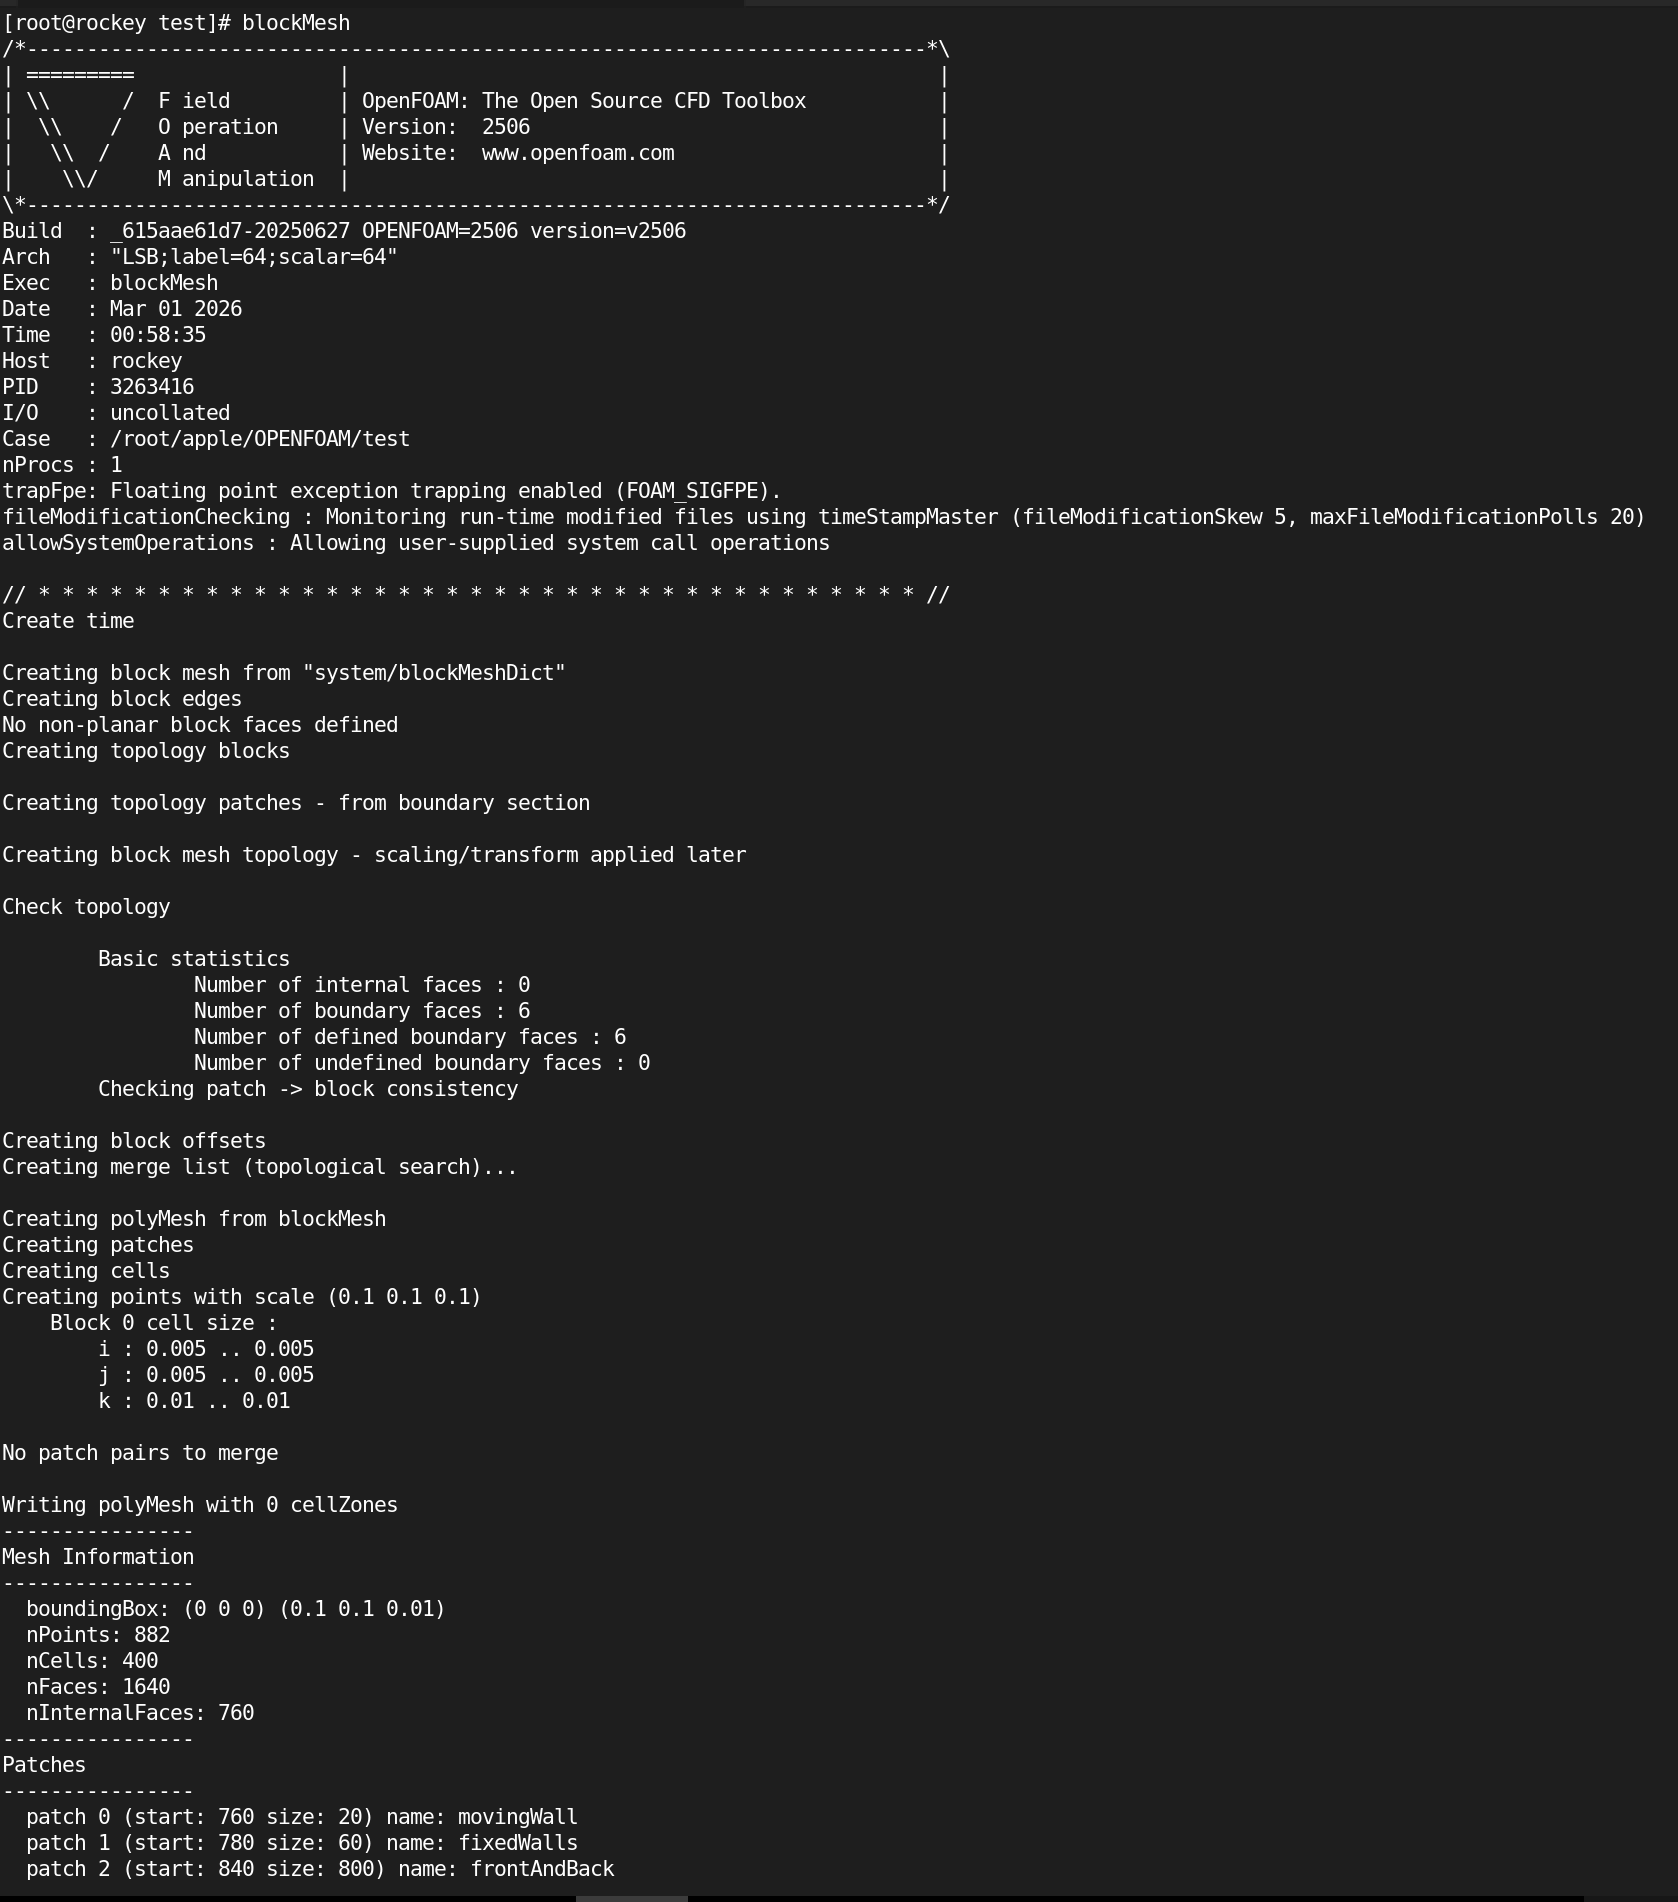
Run the blockMesh utility to generate the mesh:
blockMesh
 Why This Step is Required:
The
Why This Step is Required:
The blockMesh utility reads the blockMeshDict file (located in the system directory) and creates the mesh for your simulation. You must run this command before running any solvers.
3.3 Verify the Mesh
After running blockMesh, verify that the mesh has been created successfully. You can check the constant/polyMesh directory for the generated mesh files:
ls constant/polyMesh

You should see files like boundary, faces, and points, which indicate that the mesh has been generated.
4. Run the Simulation with icoFoam
Once the mesh is created, you can run the simulation using the icoFoam solver. This solver solves the incompressible Navier-Stokes equations for laminar flow.
4.1 Run icoFoam
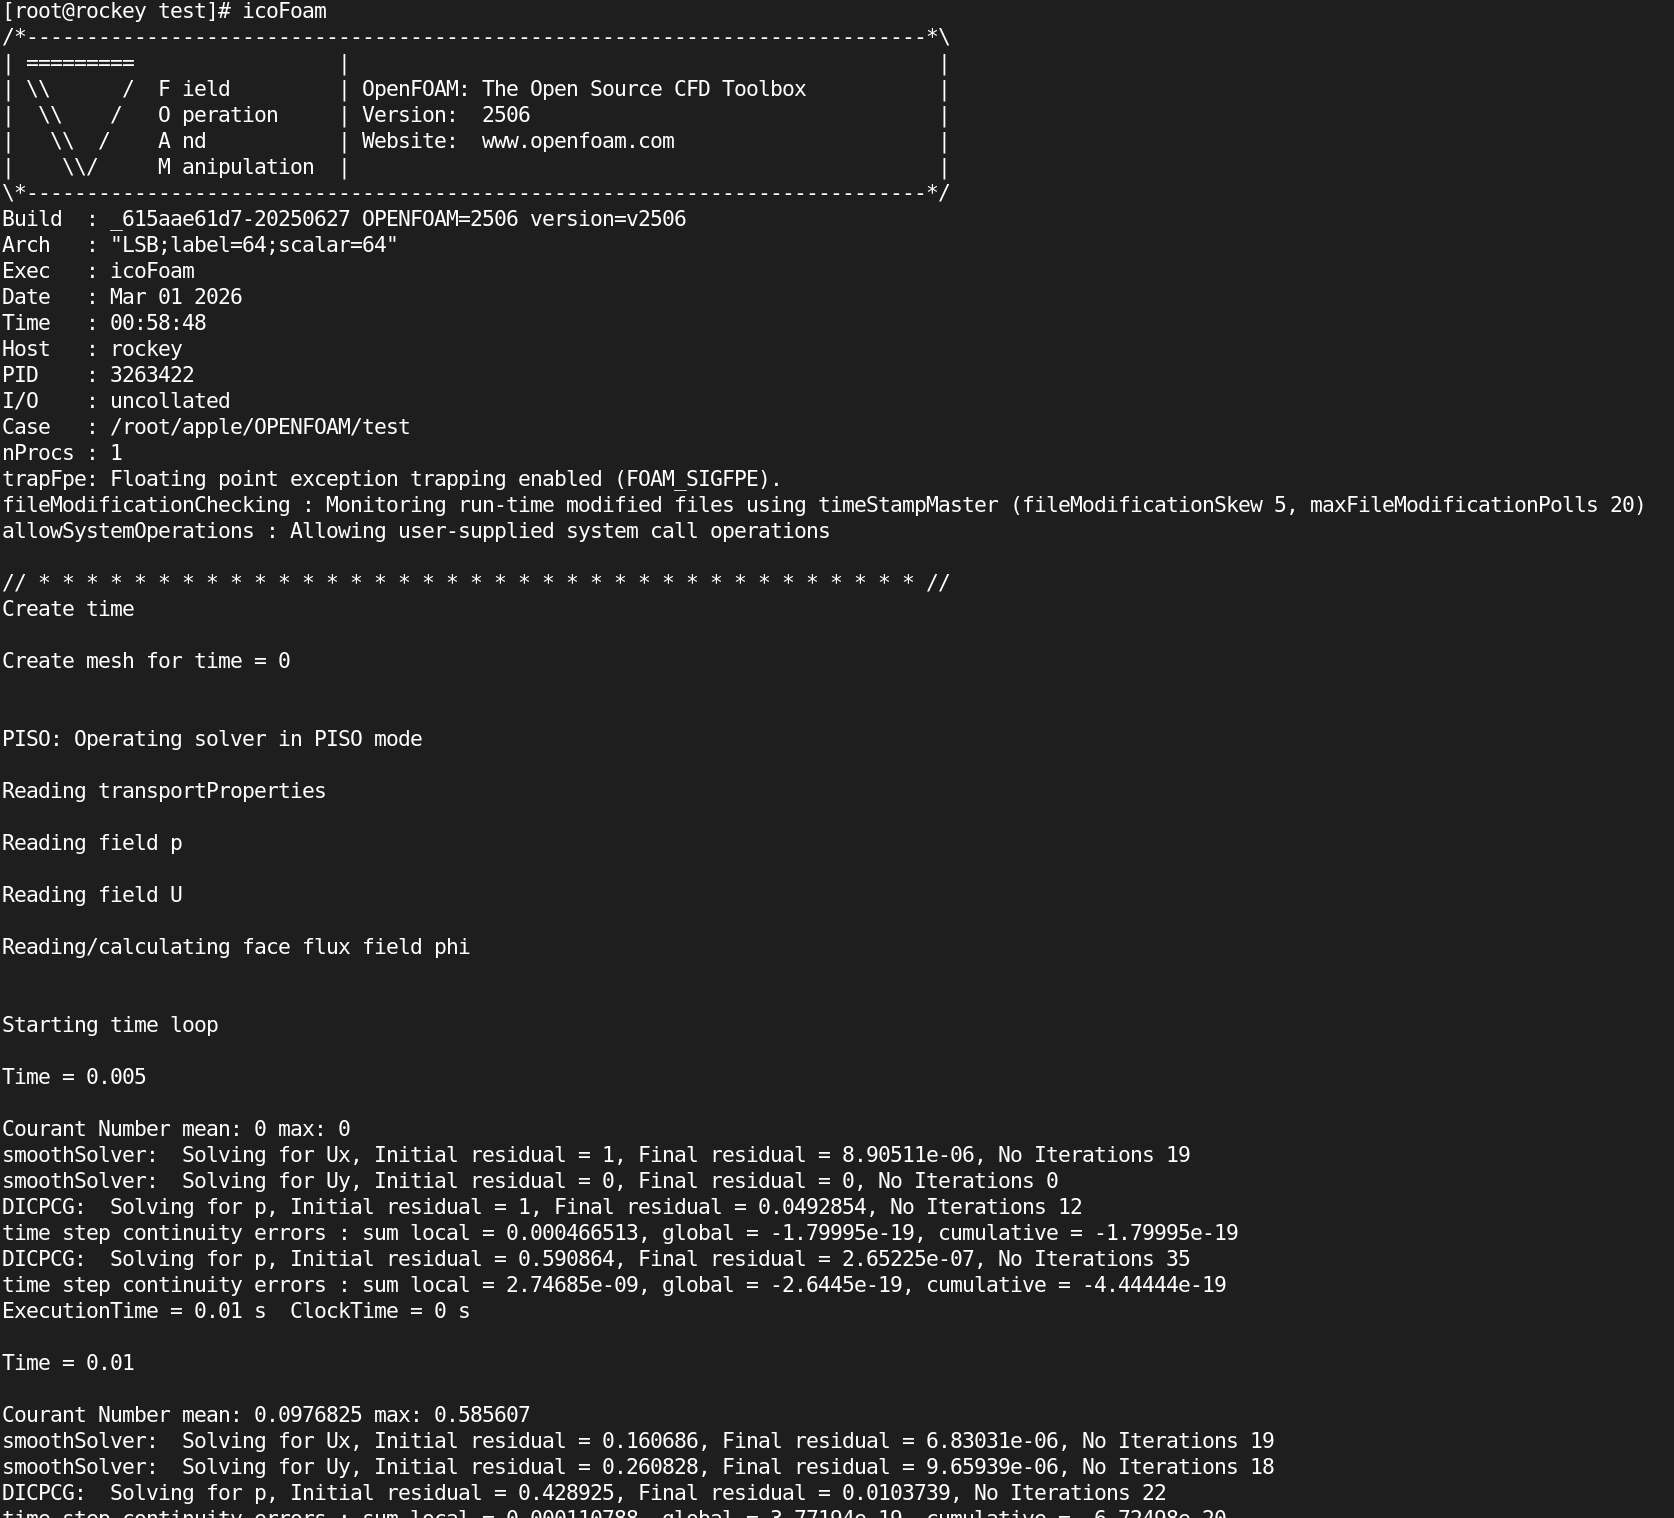
To start the simulation, run the icoFoam solver:
icoFoam
 Why This Step is Required:
The
Why This Step is Required:
The icoFoam solver computes the flow field for the test case (cavity flow in this example). It reads the mesh and boundary conditions, then calculates the velocity and pressure fields.
4.2 Check the Solver Output
You will see output in the terminal as the solver iterates through time steps. Look for the following key indicators:
- Courant Number: It should stay within an acceptable range for stability.
- Residuals: These should decrease over time, indicating convergence.
Example output:
Time = 0.005
Courant Number mean: 0.0976825 max: 0.585607
smoothSolver:  Solving for Ux, Initial residual = 0.160686, Final residual = 6.83031e-06, No Iterations 19
...
Why This Step is Required:
Running the icoFoam solver verifies that OpenFOAM is properly simulating fluid flow. The solver iterates through time steps and updates the velocity and pressure fields.
5. Post-Processing and Results
After the solver has completed, you can check the results in the postProcessing/ directory for output files (such as U, p for velocity and pressure). These files contain the simulation results for each time step.
5.1 Check Results
Use the following command to list the files generated by the solver:
ls postProcessing
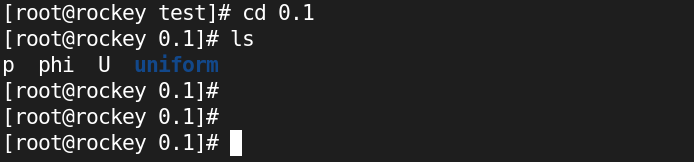
You should see the time-step directories with the result files.
This procedure confirms that OpenFOAM is correctly installed and functioning. You can now proceed with more complex simulations and case studies.
NOTE: This setup is intended for personal use on a laptop or personal machine. It is not suitable for server-level installations or large-scale simulations.
For more advanced usage, explore the official OpenFOAM documentation and tutorials.
Documentation and Tutorials
OpenFOAM provides extensive documentation and tutorials to help users get up to speed quickly. The official documentation includes:
- User Guide: Detailed explanation of how to set up and run simulations.
- Developer Guide: For those interested in modifying or extending OpenFOAM’s capabilities.
- Tutorials: Step-by-step guides for a wide range of simulations, from simple fluid flow to more complex models.
You can access all these resources at the official OpenFOAM website.
Community and Support
As an open-source project, OpenFOAM has a vibrant community of users and developers. There are various ways to get help:
- Official Forum: OpenFOAM Community Forum
- Mailing Lists: Join the mailing list to stay updated on the latest news and releases.
- OpenFOAM Wiki: A community-maintained wiki with a wealth of information on installation, usage, and troubleshooting.
Additionally, commercial support is available from OpenFOAM providers like OpenCFD.
Conclusion
OpenFOAM is a powerful tool for simulating fluid dynamics and other related processes. With its open-source nature, extensibility, and wide range of features, it is an essential resource for researchers, engineers, and scientists working in the field of computational fluid dynamics. Whether you're a novice looking to run basic simulations or an expert looking to develop custom solvers, OpenFOAM has the tools you need.
For more information, visit the official OpenFOAM website.