xCAT Automated LDAP Client Configuration
Rocky Linux 8.10 Compute Nodes
Step-by-step implementation guide for: xCAT + Rocky Linux 8.10 compute nodes + OpenLDAP + SSSD + STARTTLS + self-signed LDAP certificate.
1. Objective
The objective is to configure newly provisioned xCAT compute nodes automatically as LDAP clients.
After provisioning, every compute node should automatically have:
- SSSD installed
- OpenLDAP client installed
- authselect configured
- LDAP CA certificate copied to the node
/etc/openldap/ldap.confconfigured/etc/sssd/sssd.confconfigured- STARTTLS enabled
- sssd and oddjobd enabled
- LDAP users available through getent
- LDAP users able to authenticate through SSH
- Home directories created automatically
The final architecture is:
xCAT Management / LDAP Server
192.168.245.128
   |
   +--------------------+--------------------+
   |                                         |
xCAT Provisioning                       OpenLDAP
   |                                         |
   |                                    LDAP : 389
   |                                    STARTTLS
   |                                         |
   v                                         v
Rocky Linux 8.10                    LDAP Users / Groups
Compute Nodes
   |
   +-- SSSD
   +-- OpenLDAP Client
   +-- ldap.crt
   +-- ldap.conf
   +-- sssd.conf
   |
   v
LDAP Authentication
2. Environment
The configuration used in the lab is:
| Component | Value |
|---|---|
| xCAT Management Node | labtesting |
| xCAT / LDAP Server IP | 192.168.245.128 |
| LDAP hostname | labtesting |
| Compute Node | cnode01 |
| Compute Node IP | 192.168.245.10 |
| Operating System | Rocky Linux 8.10 |
| LDAP Base DN | dc=labtesting,dc=local,dc=com |
| LDAP User OU | ou=People |
| LDAP Group OU | ou=Group |
| LDAP Port | 389 |
| LDAP Security | STARTTLS |
| LDAP Certificate | /etc/openldap/certs/ldap.crt |
| SSSD Configuration | /etc/sssd/sssd.conf |
| OpenLDAP Client Configuration | /etc/openldap/ldap.conf |
3. Prerequisites
Before starting, verify the LDAP server is working.
On the xCAT/LDAP master:
systemctl status slapd
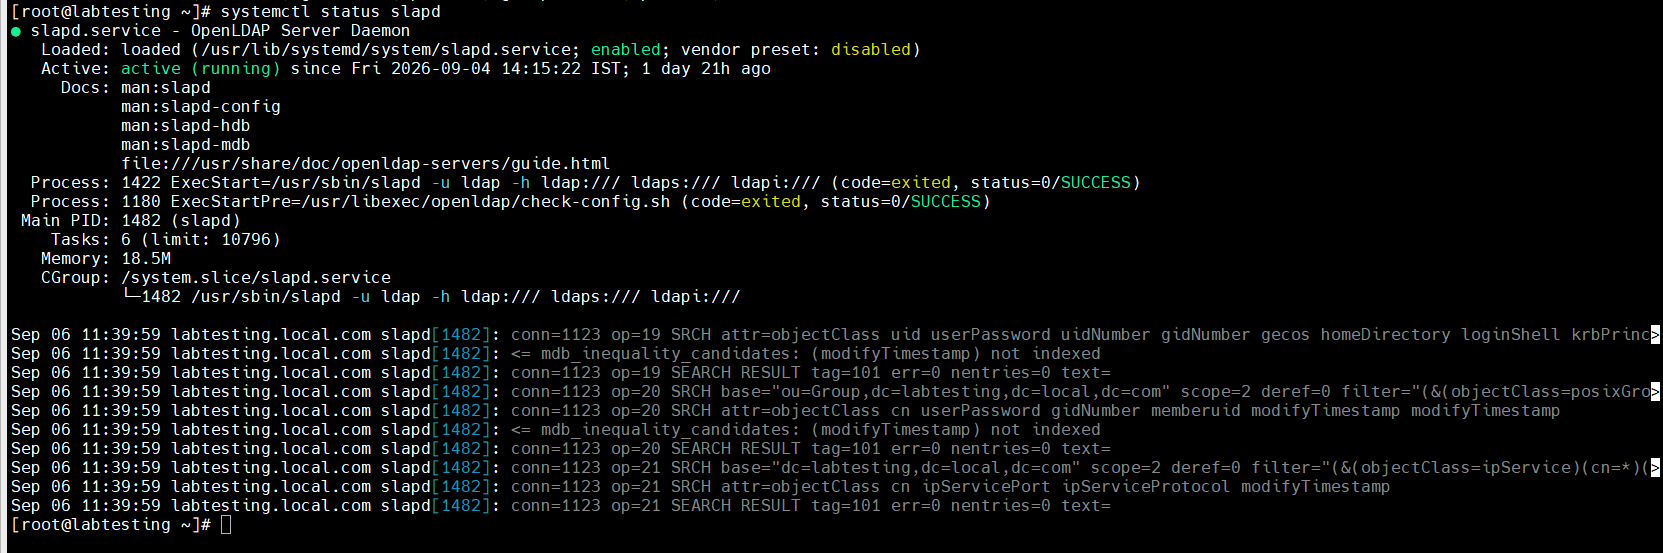
Step 3 — systemctl status slapd
Check LDAP port:
ss -lntp | grep :389

Step 3 — ss -lntp confirming port 389 listening
Expected: LISTEN ... :389
Test LDAP locally:
ldapsearch -x \
  -H ldap://192.168.245.128:389 \
  -b "dc=labtesting,dc=local,dc=com" \
  -s base
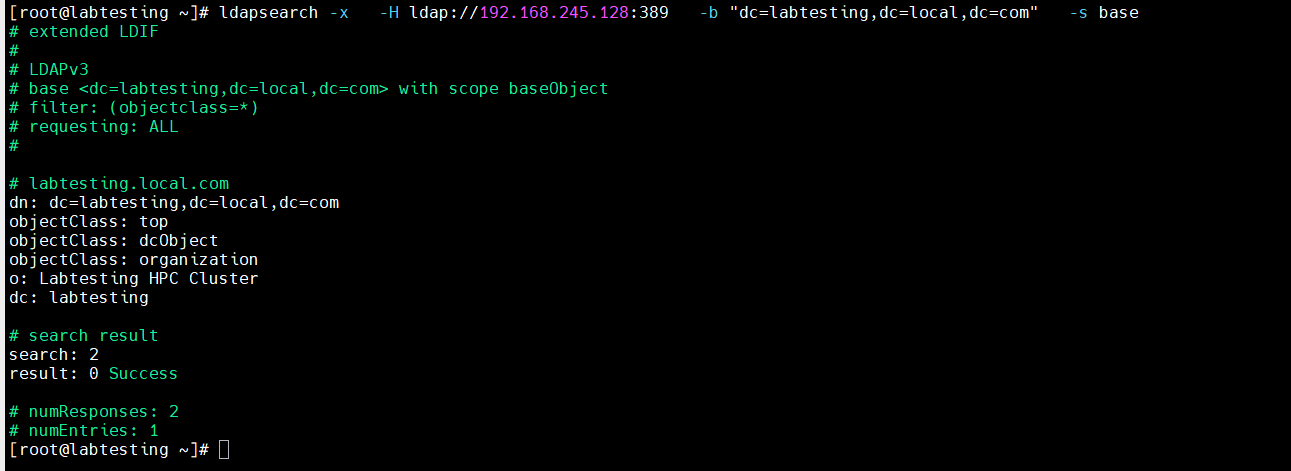
Step 3 — ldapsearch local base test
Expected: result: 0 Success
4. Verify the LDAP Certificate
The LDAP server is using a self-signed certificate.
On the LDAP master:
openssl x509 \
  -in /etc/openldap/certs/ldap.crt \
  -noout \
  -subject \
  -issuer \
  -fingerprint \
  -sha256
In your environment, the certificate has CN = labtesting, and the issuer is also CN = labtesting. This means the certificate is self-signed.
5. Verify LDAP STARTTLS
From the compute node:
openssl s_client \
  -connect 192.168.245.128:389 \
  -starttls ldap \
  -CAfile /etc/openldap/certs/ldap.crt \
  -verify_return_error
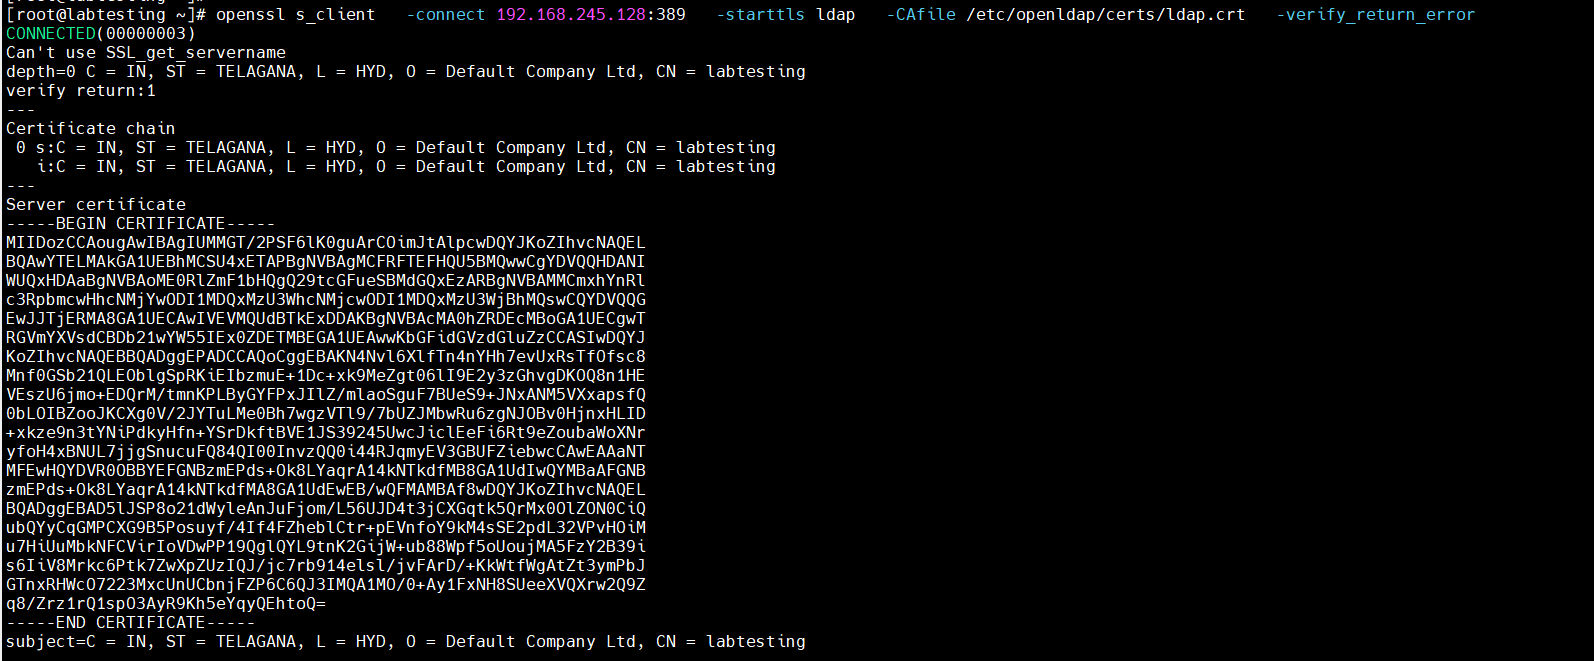
Step 5 — openssl s_client STARTTLS handshake
The important result is Verification: OK and Verify return code: 0 (ok).
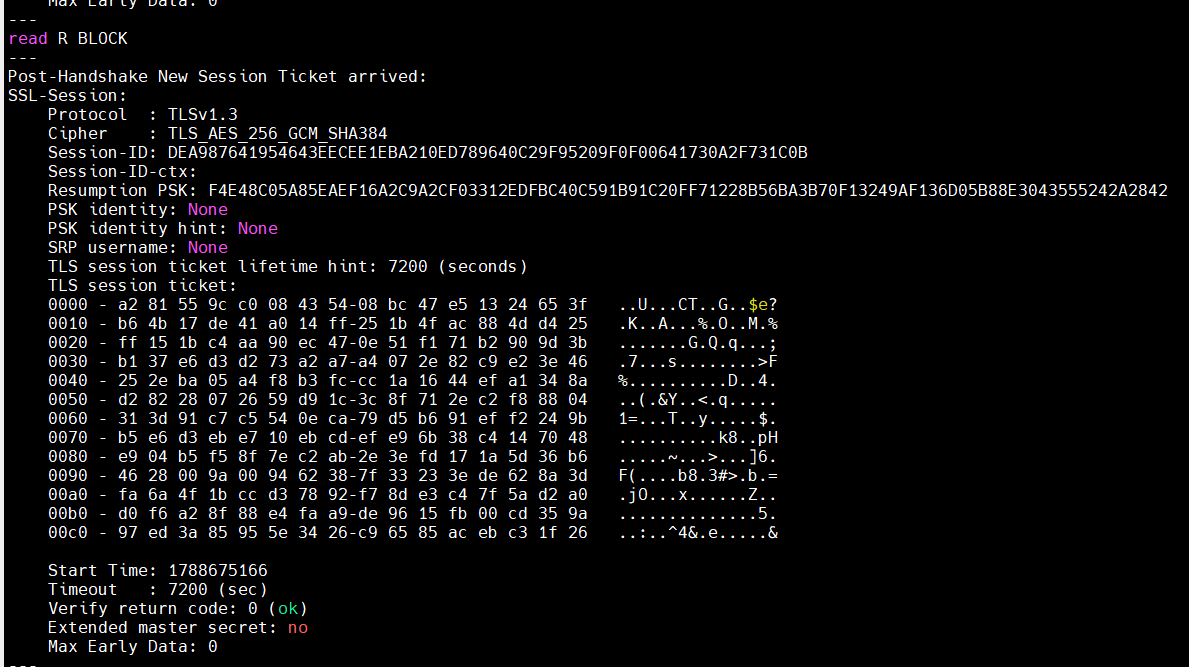
Step 5 — Verify return code 0 (ok)
This confirms that the LDAP certificate can be trusted when the correct CA certificate is supplied.
6. Configure Hostname Resolution
The LDAP certificate uses CN=labtesting. Therefore, the compute node should resolve labtesting -> 192.168.245.128.
On the compute node:
getent hosts labtesting

Step 6 — getent hosts labtesting
Expected: 192.168.245.128 labtesting
If it does not resolve, add it to /etc/hosts:
echo "192.168.245.128 labtesting" >> /etc/hosts

Step 6 — adding labtesting to /etc/hosts
Verify:
getent hosts labtesting
Why this matters Using ldap://192.168.245.128 caused TLS: hostname does not match name in peer certificate. The certificate is for labtesting, not 192.168.245.128. Therefore the final configuration uses ldap://labtesting.
7. Prepare the LDAP Certificate for xCAT
The compute nodes need the LDAP certificate. The original certificate is on the xCAT/LDAP master at /etc/openldap/certs/ldap.crt.

Step 7 — original ldap.crt on the master
Create the xCAT syncfiles directory:
mkdir -p /install/syncfiles/etc/openldap/certs
Copy the certificate:
cp /etc/openldap/certs/ldap.crt \
  /install/syncfiles/etc/openldap/certs/ldap.crt
Verify:
ls -l /install/syncfiles/etc/openldap/certs/ldap.crt

Step 7 — certificate present under xCAT syncfiles
8. Why We Use xCAT syncfiles
Do not use scp root@192.168.245.128:/etc/openldap/certs/ldap.crt ... from the compute node.
During testing, this failed with:
Permission denied (publickey,gssapi-keyex,gssapi-with-mic,password)
The reason is that the compute node is configured to receive files/commands from xCAT, but it does not necessarily have root SSH access back to the xCAT management node.
Therefore the correct direction is:
xCAT Management Node
   |
   | xCAT syncfiles
   v
Compute Node
not:
Compute Node
   |
   | scp
   v
xCAT Management Node
9. Verify the Node's xCAT Postscript Configuration
Check:
lsdef cnode01
The node should contain:
postscripts=syslog,remoteshell,syncfiles,setup_chrony_client,setup_ldap_client
The important order is syncfiles before setup_ldap_client. This allows the certificate to be present before the LDAP configuration script starts.

Step 9 — lsdef cnode01 showing postscripts order
10. Create the LDAP Postscript
Create the postscript:
vi /install/postscripts/setup_ldap_client
Use the following script:
#!/bin/bash
# ============================================================
# xCAT Postscript: setup_ldap_client
#
# Rocky Linux 8.10
#
# LDAP Server  : 192.168.245.128
# LDAP Hostname: labtesting
# LDAP Base DN : dc=labtesting,dc=local,dc=com
# ============================================================
set -e

LDAP_SERVER="192.168.245.128"
LDAP_HOSTNAME="labtesting"
LDAP_BASE_DN="dc=labtesting,dc=local,dc=com"
LDAP_CERT="/etc/openldap/certs/ldap.crt"

echo "=============================================="
echo " Starting LDAP Client Configuration"
echo "=============================================="
echo "LDAP Server : ${LDAP_SERVER}"
echo "LDAP Hostname: ${LDAP_HOSTNAME}"
echo "LDAP Base DN : ${LDAP_BASE_DN}"

# ------------------------------------------------------------
# 1. Install required packages
# ------------------------------------------------------------
echo "Installing LDAP/SSSD packages..."
dnf install -y \
  sssd \
  sssd-ldap \
  openldap-clients \
  authselect \
  oddjob \
  oddjob-mkhomedir

# ------------------------------------------------------------
# 2. Configure authselect
# ------------------------------------------------------------
echo "Configuring authselect..."
authselect select sssd with-mkhomedir --force

# ------------------------------------------------------------
# 3. Configure LDAP hostname resolution
# ------------------------------------------------------------
echo "Configuring /etc/hosts..."
if ! grep -qE "^[[:space:]]*${LDAP_SERVER}[[:space:]]+.*${LDAP_HOSTNAME}([[:space:]]|$)" /etc/hosts
then
  echo "${LDAP_SERVER} ${LDAP_HOSTNAME}" >> /etc/hosts
fi
echo "LDAP hostname resolution:"
getent hosts ${LDAP_HOSTNAME}

# ------------------------------------------------------------
# 4. Create LDAP certificate directory
# ------------------------------------------------------------
echo "Creating LDAP certificate directory..."
mkdir -p /etc/openldap/certs

# ------------------------------------------------------------
# 5. Verify LDAP CA certificate
#
# The certificate is copied using xCAT syncfiles
# before this postscript runs.
# ------------------------------------------------------------
echo "Checking LDAP CA certificate..."
if [ ! -f "${LDAP_CERT}" ]; then
  echo "ERROR: LDAP CA certificate not found:"
  echo "${LDAP_CERT}"
  exit 1
fi
chmod 644 "${LDAP_CERT}"
chown root:root "${LDAP_CERT}"
echo "LDAP CA certificate found."

# ------------------------------------------------------------
# 6. Configure OpenLDAP client
# ------------------------------------------------------------
echo "Creating /etc/openldap/ldap.conf..."
cat > /etc/openldap/ldap.conf <<EOF
URI ldap://${LDAP_HOSTNAME}
BASE ${LDAP_BASE_DN}
TLS_CACERT ${LDAP_CERT}
TLS_REQCERT demand
EOF
chmod 644 /etc/openldap/ldap.conf

# ------------------------------------------------------------
# 7. Configure SSSD
# ------------------------------------------------------------
echo "Creating /etc/sssd/sssd.conf..."
cat > /etc/sssd/sssd.conf <<EOF
[sssd]
services = nss, pam
domains = default

[domain/default]
id_provider = ldap
auth_provider = ldap
ldap_uri = ldap://${LDAP_HOSTNAME}
ldap_search_base = ${LDAP_BASE_DN}
ldap_user_search_base = ou=People,${LDAP_BASE_DN}
ldap_group_search_base = ou=Group,${LDAP_BASE_DN}
ldap_id_use_start_tls = true
ldap_tls_reqcert = demand
ldap_tls_cacert = ${LDAP_CERT}
cache_credentials = true
enumerate = true
EOF
chmod 600 /etc/sssd/sssd.conf
chown root:root /etc/sssd/sssd.conf

# ------------------------------------------------------------
# 8. Enable services
# ------------------------------------------------------------
echo "Enabling SSSD and oddjobd..."
systemctl enable oddjobd
systemctl enable sssd
systemctl restart oddjobd
systemctl restart sssd

# ------------------------------------------------------------
# 9. Clear SSSD cache
# ------------------------------------------------------------
echo "Clearing SSSD cache..."
sss_cache -E || true

# ------------------------------------------------------------
# 10. Test LDAP STARTTLS
# ------------------------------------------------------------
echo "Testing LDAP STARTTLS..."
ldapsearch -x \
  -H ldap://${LDAP_HOSTNAME}:389 \
  -ZZ \
  -b "${LDAP_BASE_DN}" \
  -s base

# ------------------------------------------------------------
# 11. Test LDAP user lookup
# ------------------------------------------------------------
echo "Testing LDAP user lookup..."
if getent passwd mango >/dev/null 2>&1
then
  echo "LDAP user lookup: SUCCESS"
else
  echo "WARNING: LDAP user 'mango' was not found."
fi

# ------------------------------------------------------------
# 12. Final SSSD service check
# ------------------------------------------------------------
if systemctl is-active --quiet sssd
then
  echo "SSSD service: RUNNING"
else
  echo "ERROR: SSSD service is not running."
  systemctl status sssd --no-pager
  exit 1
fi

echo "=============================================="
echo " LDAP Client Configuration Completed"
echo "=============================================="
exit 0
Save the file.
11. Set Postscript Permissions
Run:
chmod +x /install/postscripts/setup_ldap_client
Verify:
ls -l /install/postscripts/setup_ldap_client

Step 11 — postscript permissions -rwxr-xr-x
Expected: -rwxr-xr-x
12. Verify the Postscript
Run:
cat /install/postscripts/setup_ldap_client
Make sure the important settings are:
LDAP_SERVER="192.168.245.128"
LDAP_HOSTNAME="labtesting"
LDAP_BASE_DN="dc=labtesting,dc=local,dc=com"
and:
ldap_uri = ldap://labtesting
and:
ldap_id_use_start_tls = true
ldap_tls_reqcert = demand
ldap_tls_cacert = /etc/openldap/certs/ldap.crt
13. Verify xCAT SSH Configuration
Before testing the postscript, verify xCAT remote execution:
xdsh cnode01 hostname
Expected: cnode01: cnode01
You can also run:
xdsh cnode01 "cat /etc/redhat-release"
Expected: Rocky Linux release 8.10
14. Configure xCAT SSH Keys
If required:
xdsh cnode01 -K
You previously confirmed:
/usr/bin/ssh setup is complete.
return code = 0
So xCAT remote execution is working.
15. Test Certificate Synchronization
Before running the LDAP postscript, verify that the certificate can be distributed.
Run:
xdsh cnode01 "mkdir -p /etc/openldap/certs"
Then use the xCAT file-copy mechanism to copy the certificate according to your configured syncfiles setup.
After synchronization, verify:
xdsh cnode01 "ls -l /etc/openldap/certs/ldap.crt"
The certificate must exist before setup_ldap_client reaches if [ ! -f "${LDAP_CERT}" ]; then.
16. Run the LDAP Postscript on Existing Node
For an already installed node:
updatenode cnode01 -P setup_ldap_client
You should see updatenode starting, then postscripts downloaded successfully, and postscript start..: setup_ldap_client.
The expected sequence is:
- Installing LDAP/SSSD packages
- Configuring authselect
- Configuring /etc/hosts
- LDAP CA certificate found
- Creating /etc/openldap/ldap.conf
- Creating /etc/sssd/sssd.conf
- Starting SSSD and oddjobd
- Testing LDAP STARTTLS
- LDAP user lookup: SUCCESS
- SSSD service: RUNNING
- LDAP Client Configuration Completed
17. Verify the LDAP Certificate
On cnode01:
ls -l /etc/openldap/certs/ldap.crt
Then:
openssl x509 \
  -in /etc/openldap/certs/ldap.crt \
  -noout \
  -subject \
  -issuer \
  -fingerprint \
  -sha256
The fingerprint should match the certificate on the LDAP server.
18. Verify /etc/hosts
On cnode01:
getent hosts labtesting
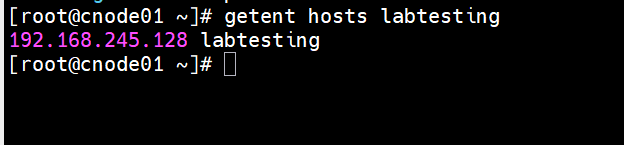
Step 18 — getent hosts labtesting on cnode01
Expected: 192.168.245.128 labtesting
19. Verify OpenLDAP Client Configuration
Run:
cat /etc/openldap/ldap.conf
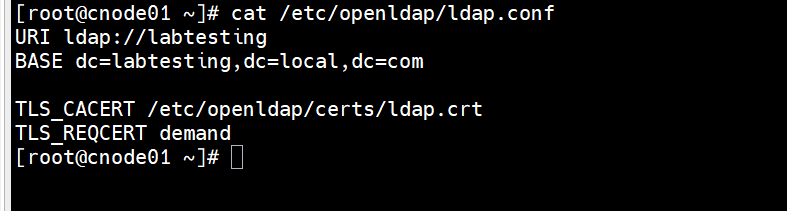
Step 19 — cat /etc/openldap/ldap.conf
Expected:
URI ldap://labtesting
BASE dc=labtesting,dc=local,dc=com
TLS_CACERT /etc/openldap/certs/ldap.crt
TLS_REQCERT demand
20. Verify SSSD Configuration
Run:
cat /etc/sssd/sssd.conf
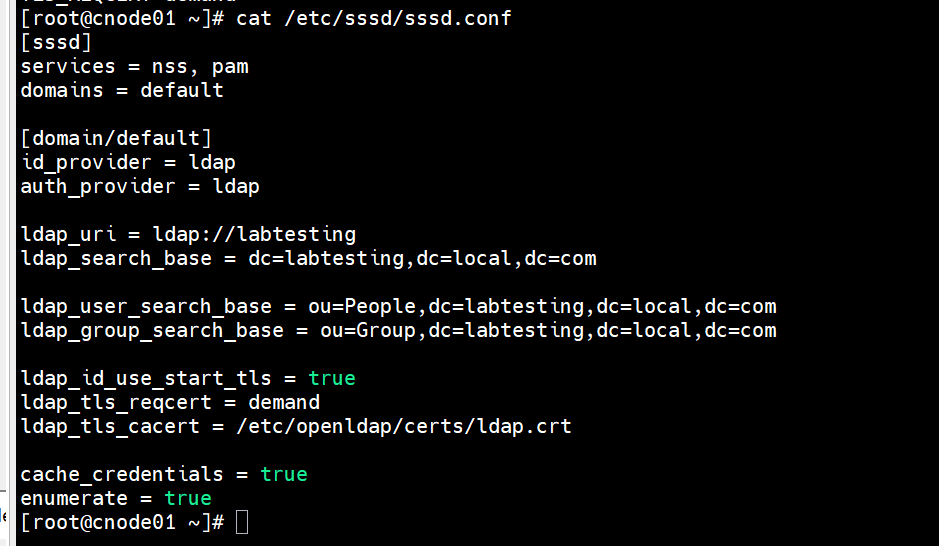
Step 20 — cat /etc/sssd/sssd.conf
Expected:
[sssd]
services = nss, pam
domains = default

[domain/default]
id_provider = ldap
auth_provider = ldap
ldap_uri = ldap://labtesting
ldap_search_base = dc=labtesting,dc=local,dc=com
ldap_user_search_base = ou=People,dc=labtesting,dc=local,dc=com
ldap_group_search_base = ou=Group,dc=labtesting,dc=local,dc=com
ldap_id_use_start_tls = true
ldap_tls_reqcert = demand
ldap_tls_cacert = /etc/openldap/certs/ldap.crt
cache_credentials = true
enumerate = true
Check permissions:
ls -l /etc/sssd/sssd.conf

Step 20 — sssd.conf permissions -rw-------
It should be -rw------- 1 root root.
21. Verify SSSD
Run:
systemctl status sssd --no-pager
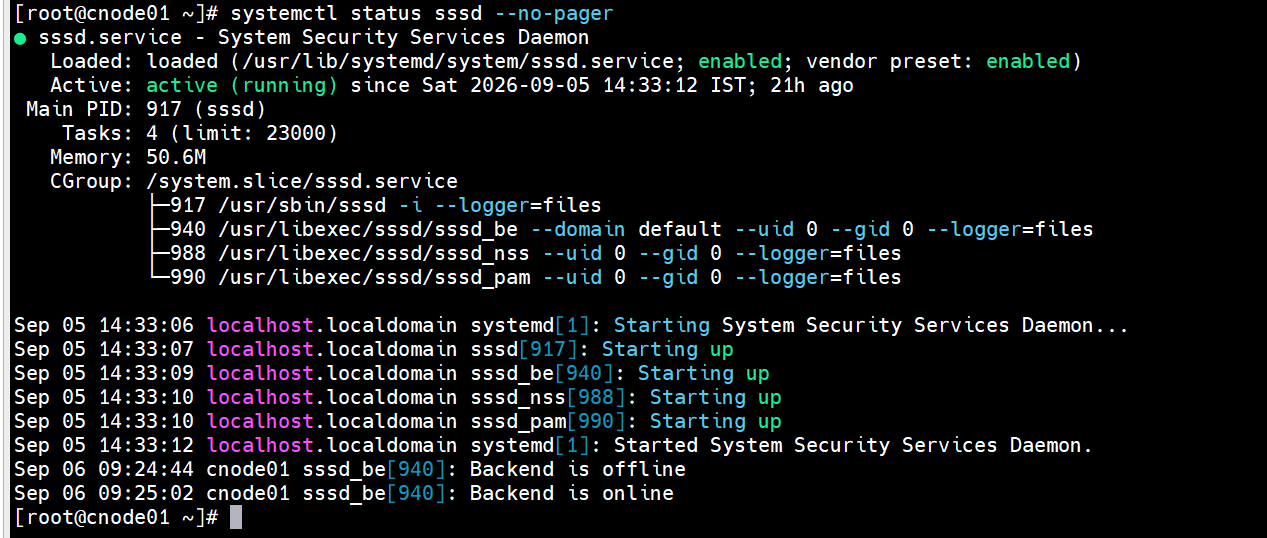
Step 21 — systemctl status sssd active
Expected: Active: active (running)
Also:
systemctl is-enabled sssd
Expected: enabled
Check oddjobd:
systemctl status oddjobd --no-pager
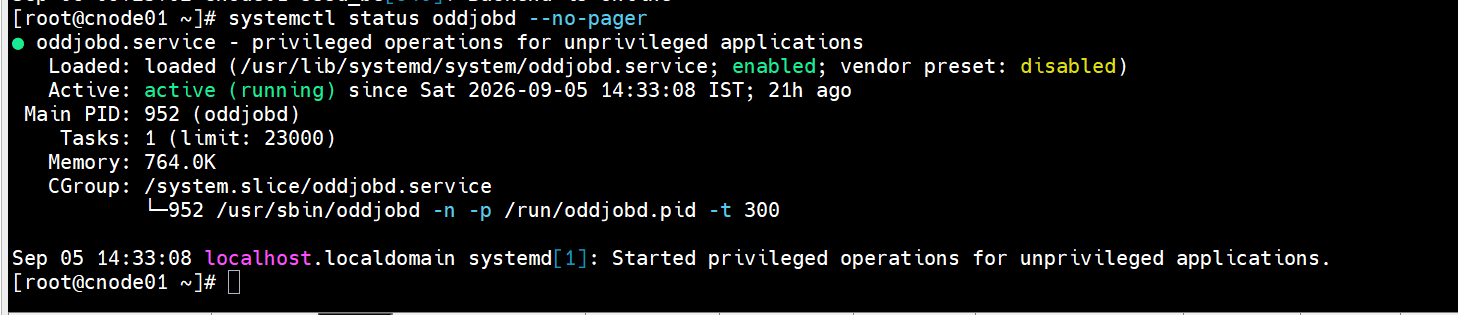
Step 21 — systemctl status oddjobd active
Expected: Active: active (running)
22. Test LDAP STARTTLS
Run:
ldapsearch -x \
  -H ldap://labtesting:389 \
  -ZZ \
  -b "dc=labtesting,dc=local,dc=com" \
  -s base
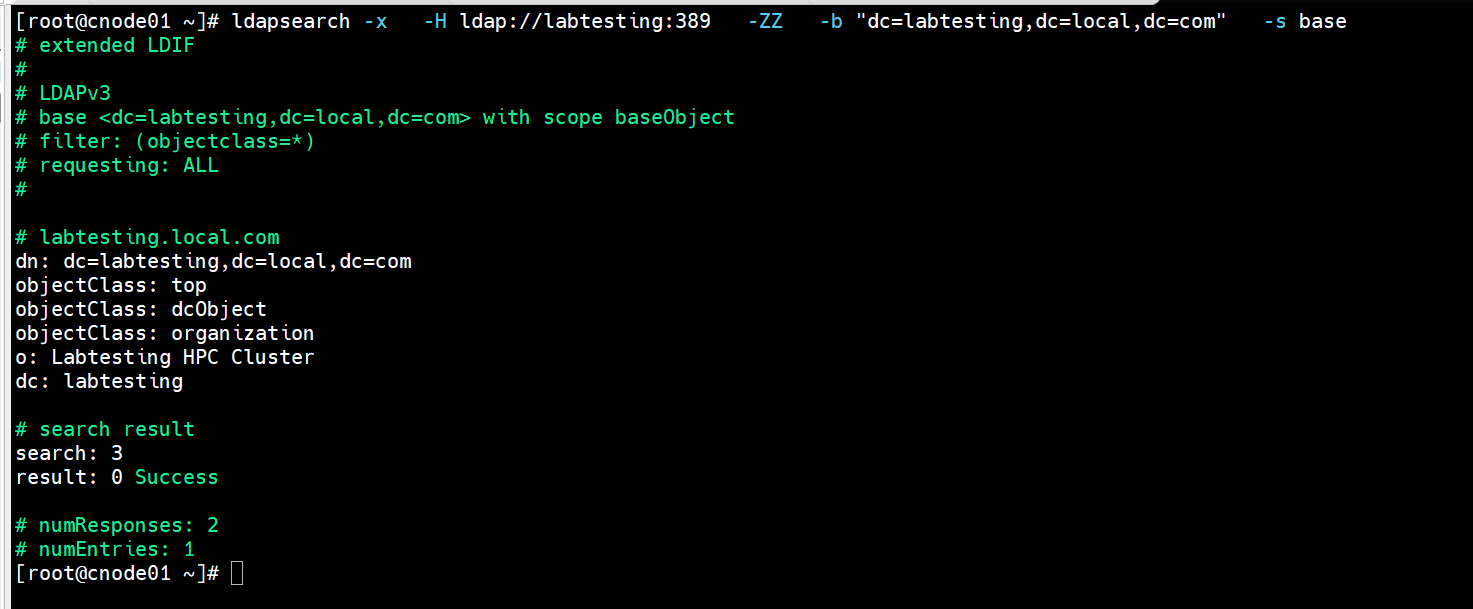
Step 22 — ldapsearch STARTTLS success
Expected: result: 0 Success
This confirms:
Compute Node
   |
   | TCP 389
   v
LDAP Server
   |
   | STARTTLS
   v
Certificate verification
   |
   v
SUCCESS
23. Test LDAP User Lookup
Test a known LDAP user:
getent passwd mango
Expected: mango:x:10001:10001:...
Then:
id mango
Expected: uid=10001(mango) gid=10001(mango) groups=10001(mango)
This confirms NSS/SSSD LDAP lookup is working.

Step 23 — getent passwd mango and id mango
24. Test LDAP Group Lookup
Run:
getent group
or a specific LDAP group:
getent group <groupname>
You can also check id mango. If LDAP groups are configured correctly, the LDAP groups should appear.

Step 24 — getent group showing LDAP groups
25. Test SSH Authentication
From the management node:
ssh mango@192.168.245.10
Enter the LDAP password. Expected: [mango@cnode01 ~]$

Step 25 — SSH login as mango succeeding
This confirms:
- LDAP user lookup -> SUCCESS
- SSSD -> SUCCESS
- PAM authentication -> SUCCESS
- SSH authentication -> SUCCESS
26. Test Home Directory Creation
Because the configuration uses with-mkhomedir, the user's home directory should be created automatically during the first login.
After login:
pwd
Expected: /home/mango
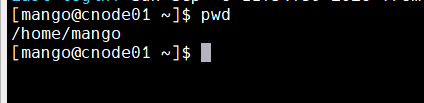
Step 26 — pwd confirming /home/mango created
Check:
ls -ld /home/mango
27. Test With Another LDAP User
For example:
ssh testuser@192.168.245.10
Then:
id
pwd
This confirms the configuration isn't working only for mango.
28. Deploy to a New Compute Node
For a new node such as cnode02, first make sure the node definition contains:
postscripts=syslog,remoteshell,syncfiles,setup_chrony_client,setup_ldap_client
Check:
lsdef cnode02
Then configure the OS image:
nodeset cnode02 osimage=rocky8.10-x86_64-install-compute
Boot the VMware VM using PXE. During installation:
Rocky Linux installation
   |
   v
OS installation
   |
   v
xCAT postscripts
   |
   v
syncfiles
   |
   v
ldap.crt copied
   |
   v
setup_ldap_client
   |
   v
SSSD configured
   |
   v
LDAP STARTTLS tested
   |
   v
LDAP authentication ready
29. Verify the New Node
After the node boots:
ssh root@192.168.245.11
Then:
getent hosts labtesting
ls -l /etc/openldap/certs/ldap.crt
cat /etc/openldap/ldap.conf
cat /etc/sssd/sssd.conf
systemctl status sssd
Then:
ldapsearch -x \
  -H ldap://labtesting:389 \
  -ZZ \
  -b "dc=labtesting,dc=local,dc=com" \
  -s base
Then:
id mango
Finally:
ssh mango@192.168.245.11
30. Final Configuration Flow
Your final automated configuration should work like this:
xCAT Management Node
192.168.245.128
   |
   v
Provision Node
   |
   v
Rocky Linux 8.10
   |
   v
syncfiles
   |
   v
/etc/openldap/certs/ldap.crt
   |
   v
setup_ldap_client
   |
   +----------------+----------------+
   |                |                |
   v                v                v
authselect      ldap.conf        sssd.conf
   |                |                |
   +----------------+----------------+
                     |
                     v
                    SSSD
                     |
                     v
                STARTTLS :389
                     |
                     v
             OpenLDAP 192.168.245.128
                     |
                     v
                 LDAP Users
                     |
                     v
             SSH Authentication
31. Troubleshooting
Problem: Certificate not found
Error: ERROR: LDAP CA certificate not found
Check:
ls -l /etc/openldap/certs/ldap.crt
Then check xCAT's syncfiles source.
Problem: Certificate verification failed
Error: certificate verify failed
Test:
openssl s_client \
  -connect 192.168.245.128:389 \
  -starttls ldap \
  -CAfile /etc/openldap/certs/ldap.crt \
  -verify_return_error
You want: Verify return code: 0 (ok)
Problem: Hostname mismatch
Error: TLS: hostname does not match name in peer certificate
Check:
getent hosts labtesting
grep labtesting /etc/hosts
The node should resolve 192.168.245.128 labtesting. SSSD should use ldap_uri = ldap://labtesting, not ldap_uri = ldap://192.168.245.128.
Problem: LDAP user is visible but cannot log in
Check:
id mango
If that works, test:
ssh mango@<compute-node-IP>
Then inspect:
journalctl -u sssd --no-pager -n 100
tail -100 /var/log/sssd/sssd_pam.log
Problem: sssctl command not found
Check:
rpm -ql sssd | grep sssctl
rpm -qa | grep sssd
This does not necessarily mean LDAP authentication is broken; verify with id mango and an actual SSH login.
32. Final Verification Checklist
Before declaring the xCAT LDAP integration complete:
- [ ] LDAP server is running
- [ ] LDAP port 389 is reachable
- [ ] LDAP search works
- [ ] LDAP STARTTLS works
- [ ] LDAP certificate copied to compute node
- [ ] Certificate verification returns 0 (ok)
- [ ] labtesting resolves to 192.168.245.128
- [ ] /etc/openldap/ldap.conf created
- [ ] /etc/sssd/sssd.conf created
- [ ] authselect configured
- [ ] SSSD running
- [ ] oddjobd running
- [ ] getent passwd \<LDAP-user> works
- [ ] id \<LDAP-user> works
- [ ] LDAP user SSH login works
- [ ] Home directory is created
- [ ] xCAT syncfiles copies certificate
- [ ] setup_ldap_client executes successfully
- [ ] New compute node receives the same configuration
Final Result
Once this is configured, you do not need to manually configure LDAP on every compute node.
For every new Rocky Linux compute node:
xCAT PXE provisioning
   |
   v
syncfiles -> ldap.crt
   |
   v
setup_ldap_client
   |
   v
SSSD + OpenLDAP configuration
   |
   v
STARTTLS
   |
   v
LDAP user authentication
Result: This gives you a repeatable xCAT-based LDAP client deployment across the cluster.